The Physiological Effects Of Caffeine

The Physiological Effects Of Caffeine

cofee

In this post, we’ll be talking about the physiological effects of caffeine on your body and explore how caffeine works. If you’ve ever asked yourself the question “Should I drink coffee?”, I think that by the end of this article you’ll know a bit more about the behaviour of caffeine and you may regulate your caffeine consumption accordingly.

Life Starts After Coffee!

I once saw this written on a blackboard in front of a little cafe in London. I couldn’t agree more with that statement, especially because it was 7 in the morning, and I truly didn’t feel much alive yet. This cheeky little slogan made me buy their coffee, although I had already had one at home. Sometimes it only takes one witty slogan to steer you in a direction of an unhealthy choice.

Not long after this, I encountered another funny one on a busy road in London Islington. It said: “This is the last coffee shop for the next 2500 miles”. Impossible to resist that one!

And one more, in Shoreditch, at the beginning of December:

“I dream of flat white Christmas…”

Good or Bad?

There are many different opinions as for whethere coffee is good or bad for you. Most of us love coffee (including myself). I find the smell of freshly ground coffee irresistible. It makes me think “If it smells so divine it must surely be God’s gift to us!”

Ok then, let’s start with the good news for the coffeeholics.

coffee beans

The Benefits of Drinking Coffee

It is believed that when coffee is consumed in moderation, without sugar and well before noon, it can benefit your system by sending more oxygen to your brain, speed up your reflexes, making you more alert, boost up your productivity and improve your mood. Some studies go even that far to claim that coffee can contribute to the prevention of cancer and Type 2 Diabetes.

The Dark Side of Coffee

However, it is equally known that drinking coffee can result in a number of problems such as feeling edgy and nervous, experiencing insomnia or even panic attacks. I once had a major panic attack after drinking 3 double espressos before a flight. (I was clearly asking for trouble by doing that!)

Depressive moods, trouble with sleep, panic attacks, very frequent colds, and craving for carbohydrates were very familiar to me during my thirties. It was eye-opening to learn that part of these issues may have been caused by my over-consumption of caffeine.

The best way is to gain some understanding how caffeine works, and then you can make better choices regarding when and how often to drink coffee, or if to drink it at all.

coffee cup and heart rate

How Caffeine Works

I used to drink coffee a lot because I thought it was stimulating my body, thus giving me more energy. But when I discovered how caffeine works, it kind of put me off from drinking it too often.

Caffeine and Adenosine

Have you ever wondered what’s behind the stimulating effect of caffeine?

When caffeine enters our body, it binds to the receptors of a chemical called adenosine. Adenosine is a neurotransmitter that prepares our body for sleep by calming us down by slowing down our neural activity. It also dilates the blood vessels to ensure good oxygenation while we sleep. Basically, this chemical is responsible for giving us the ‘go to bed!’ signal so we can recharge our body.

But caffeine prevents adenosine from binding to its receptors. It blocks the molecules of adenosine from entering them. As a result, we don’t feel tired when we would be naturally.

But why does caffeine bind to the adenosine receptors in the first place? Because, interestingly enough, it is very similar to adenosine shape-wise. You could compare it to a key fitting into a keyhole. The key of caffeine has almost the same shape as the key of adenosine – thus it can easily block the adenosine receptor (keyhole) and molecules of adenosine just end up piling up in front of its own receptors, without being able to enter them. (Does it also make you feel rather sorry for them..?)

Caffeine Makes Us Deaf To Our Body’s Signals

Our body is wise, and so with the help of adenosine, it makes us tired and sleepy when it needs to rest and recharge – just as the battery in your mobile, which will signal when it’s time to plug it in a charger. However, when caffeine blocks the adenosine receptors, we may be naturally tired and in need of rest, but we don’t feel it, because adenosine has been blocked and cannot do its job – i.e. to calm our nervous system and make us tired.

Consequently, we feel the stimulating effect of caffeine,  while, in reality, our body really needs to recharge by having a nap or a deep rest, but we don’t feel ‘on top of the world’ and keep going at our full speed. Imagine what would happen to your mobile if it kept telling you that your battery is at 100% while in reality, it was 2%, and you kept using it recording videos, using multiple apps, having conference calls etc. At one point, it would inevitably shut down, when you’d need it the least.

The same happens with the ‘caffeine crash’. When the receptors of adenosine are unnaturally blocked by caffeine, adenosine will build up, and in the end we’ll end up more tired than if we hadn’t drunk any coffee at all.

Built-up Adenosine Will Catch Up With You

Notice that if you are on a several days’ coffee binge, that you often wake up tired. Even if you had enough hours to sleep, you’re not rested. Why’s that? Because by allowing caffeine to block all the adenosine receptors, there’s a lot of spare adenosine floating by, and once caffeine wears off, all the excess adenosine is suddenly fere to do their job, i.e. yelling at you how desperately exhausted you are.

You probably wouldn’t mind this at half-past eleven in the evening,  but at nine in the morning, after good eight hours of sleep, it’s not good news. And this is caused by that nice buzz of those few double espressos of yesterday.

So what do you usually do when you feel tired because of all that excess adenosine and just can’t get going in the morning? You usually reach for more coffee. And that, of course, creates even more blocked receptors, and more floating sleep-inducing chemicals that will hit you even harder later on. You have just caught yourself in a vicious circle.

What’s worst, you no longer experience that nice buzz that you get when you drink coffee only once in a while (as I do, after having learned my lessons). Now you either don’t feel anything or get this kind of wired, edgy feeling, verging on panicking, because your brain is not allowed to rest. It’s being ruled by caffeine, which can now dictate your moods and play quite wildly with your energy levels.

coffee beans and glass mug

Caffeine Fools You About Having Energy

So it’s good to remember that caffeine does not give us natural energy, it only conceals our tiredness. In a way, caffeine is ‘hijacking our nervous system’ by telling us we are not tired. It will ‘lie to us’ about feeling full of energy and then hit us with sudden exhaustion.

As much as I love coffee, I don’t like this ‘sneaky behaviour’ of caffeine. The idea that some external substance is bullying the molecules in my body by blocking their own receptors makes me want to start a petition for the rights of adenosine. But, of course, as soon as I smell the divine aroma of coffee, I forget all about it..!

Dopamine and the Comedowns

We love coffee because it can almost immediately improve our mood. This is caused by the release of dopamine, the ‘get going’ chemical that can cause pleasurable states that we want to experience every day, and which is the reason why the Starbucks, Costa or Nero signs have such magnetic effect on a lot of us.

But once the rush we get from artificially released dopamine is over, we can experience fatigue and low moods, even depression.

Caffeine Speeds Up Neural Activity

Do you know that jittery or even anxious feeling after you’ve had a strong coffee or any other caffeinated drink such as Red Bull?

As you already know, adenosine’s job is to slow down our neural activity. However, when it’s blocked by caffeine, it has fewer receptors available for the adenosine to ‘hit the brakes’ of the neural activity, which, in turn, will speed up instead.

So now there’s a storm of neural activity in our brain caused by caffeine, which results in the emergency production of adrenaline.

Adrenalin – the #1 Stress Chemical

Caffeine has the power to activate a number of neural circuits in our body. This causes the pituitary gland in our brain to ‘think’ that there is some sort of emergency happening, and that we are in danger.

Consequently, it will start to secrete hormones that send a signal to adrenal glands to start producing more adrenalin. Adrenalin is the hormone produced during the ‘fight or flight’ response, helping us survive by escaping danger or attacking an enemy or a predator.

To be able to get into such a state, we need an extra boost of energy and attention level – and this is exactly what we coffee drinkers get after downing a double espresso.

However, the price to pay for this heightened state is the comedown, when we suddenly feel even more tired than before drinking that coffee.

Increased Acidity: Cancer and Faster Aging

Caffeine is the culprit behind the chemical reactions of an emergency response – ‘fight or flight’ – and part of this reaction is a release of stress chemicals including adrenaline and cortisol. During the emergency response, the levels of adrenalin and cortisol in your body will increase. Both adrenalin and cortisol are acidic in nature. If we allow our body to become acidic, we are risking creation of the perfect environment for cancer.

Also, if your body is acidic, your body will age much faster!

It’s good to remember that if you drink coffee every day, your body’s’ acidity will be increasing. So this is another big reason why I reduced my coffee intake.

Caffeine Depletes Serotonin

Caffeine is also responsible for the depletion of serotonin, which is quite a big price to pay for the temporary caffeine-dopamine high. Serotonin has an important function of regulating our sleep cycles, digestion, pain control and immunity.

Lack of serotonin makes us also crave carbohydrates, so drinking too much can indirectly lead to gaining weight.

Disturbed Sleep

Caffeine can stay in your system for many hours and affect your sleep badly.

An espresso shot reaches a top level in your bloodstream within half an hour to up to 1 hour. Caffeine takes much longer time to process that you would think. Processing caffeine and getting rid of it from your system can take about 10 or even 12 hours!

So, it is wise to calculate when to have your cup of coffee, especially if you want to go to bed early and enjoy a deep, restorative sleep. The best thing is to have a good reserve of 12 hours before you plan to sleep. To be on the safe side, I tend to have my coffee by 10 am, so I’m ‘all clear’ by midnight.

If I had a coffee at 1pm, I would still have difficulty in falling asleep at 11pm. Other people may not – it all depends on individual metabolic system.

Is Caffeine Addictive?

Yes, you can develop a caffeine addiction. Whilst, in y case, it used to be mostly psychological, (I just could not imagine my morning bus commute to work without as comforting hot cup of soya latte) other people can develop physical dependency and experience withdrawal symptoms. A day or two after your last coffee binge you may suddenly experience a huge drop in energy, feeling extremely sleepy and weak, getting headaches, or experiencing digestion issues.

Best Coffee Alternatives

Let’s be honest. There are no coffee alternatives. Coffee is coffee, however hard you tried to swap it for guarana drinks or chicory.

If you love coffee as I do, it’s a life-long love affair and that’s it. Instead, I’d suggest drinking coffee in moderation and don’t try to replace it with anything – it’s a lost battle. If you torture yourself with all the coffee imitations, you’ll end up returning to coffee and drink it

The best thing you can do is to learn a few tricks on how to access those ‘get going’, pleasant states through other methods, such as controlled breathing or meditation. This will help you reduce your cravings for coffee in the most natural way, without feeling restricted or forced. This is what’s happened to me when I discovered these techniques, and I’m happy to share them here:

Controlled Breathing

One way of getting our body more alkaline than acidic is deep breathing. You can check four easy breathing techniques that can help you with that in my article Breathing Techniques for Your Health.
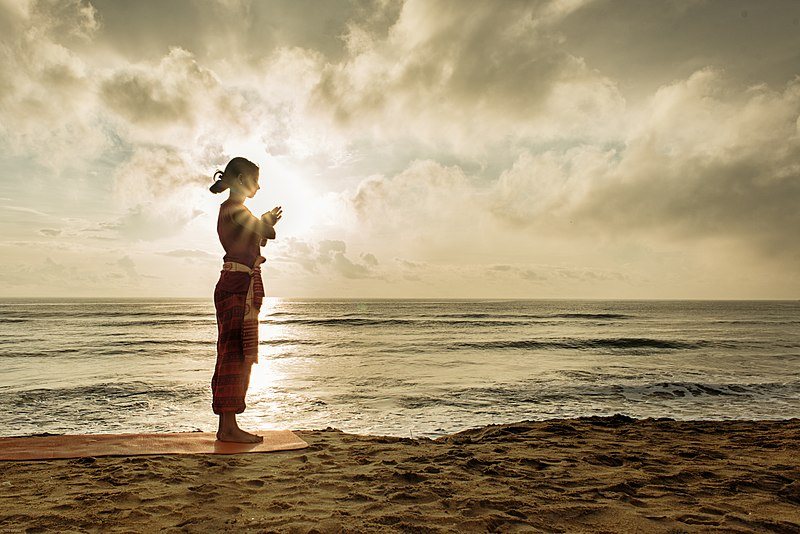
Meditation

I was intrigued when I came across a Google talk by a meditation teacher Emily Fletcher, called ‘Why Meditation is the New Caffeine’. She says she hopes that one day coffee shops will be replaced by meditation stations. Why? Because meditation can give you a similar energy boost a slight ‘high’ like caffeine, without the bad side effects like jitters or energy crash. It produces dopamine and serotonin, but without making your body acidic, but alkaline. Ank alkaline environment is means slowed process of aging and prevention of cancer!

Recharging with meditation15 Minutes!

What’s even more exciting, meditation has been more and more viewed and approached as a productivity tool. If you commit to a regular practice, you can gain the kind of energy that you’d normally seek in caffeine, and have much more done. But unlike caffeine, with meditation, your sleep will get better and you might even need fewer hours of sleep that you’d need in the past. I’m happy to say that this has happened to me, and I describe my experience in my article The Physical and Psychological Benefits of Meditation, where I dive into the fascinating science behind this ancient practice.

A Ray of Hope for Coffee Lovers

If you managed to get to the end of this article, and you are a coffee lover (like me!), you may be wondering: ‘Can I ever enjoy my coffee guilt-free?’

Here’s a ray of hope for coffee lovers: If you become more conscious about drinking coffee and adopt a number of healthy habits, you may, at least to a certain extent, decrease the harmful effect of caffeine on your body. Timing and frequency play a huge role in this. Occasional morning coffee can be enjoyable and shouldn’t give you any dramatic side-effects, especially if you take good care of your body through sport, breathing practices, or meditation.

Seeing the bigger picture has helped me limit my caffeine intake. Now I treat myself to a morning cup of coffee about two times a week, but definitely not as a daily ritual, or even several times a day as in the past.

I hope that you have found this post helpful and, if you are a coffee lover, not too daunting. If you think you just cannot function without coffee, I would highly recommend trying breathing practices and meditation, and see that your need for daily caffeine boost will decrease naturally, without having to restrain yourself and feel you are missing out on one of your favourite treats.

Your thoughts on this topic are much welcome in the comments below!

BY LUCIE DUN

This site has been built with DIVI, by Elegant Themes.

RECOMMENDED SECTIONS:

Online courses and webinars
Health and Wellbeing Products
Inspirational Books and Audio

Disclaimer: This page contains affiliate links. This means that if you decide to make a purchase through my links, I will earn a small commission at no extra cost to you. (The full Affiliate Disclosure can be read here.) If you’d like to learn more about affiliate marketing, e.g. how to earn extra income from blogging and promoting products you like and would recommend to others, which is what I do, check out Wealthy Affiliate, my favourite platform for online marketers. You can create a free account, which will enable you to make your own website in a few simple steps, and host it with them – free of charge – for as long as you like. You can test it right now by trying their free website builder SiteRubix. Thank you for visiting!

Free starter membership with Wealthy Affiliate

   Let’s keep in touch:

Naturegrooves Logo 19

 in alliance with

Buddhagroove-Logo_website
buddhagroove

Breathing Techniques for Better Health

Breathing Techniques for Better Health

breathing techniques

In this article, I’ll be describing four breathing techniques for better health, increased levels of happiness, deeper sleep, or even prevention of panic attacks. Most of us are not really aware of our own breath and end up breathing in a shallow, stressed way. However, being able to control our breathing can lead to a number of huge health benefits and improve many aspects of our lives.

Autopilot Breathing

We enter this life on an in-breath and leave it on an out-breath. Between these two breaths that symbolise our emerging and coming back, we mostly breathe in an automatic, unconscious way. This is because our breathing is controlled by our autonomic nervous systems – it happens automatically, all by itself.

There’s nothing wrong with breathing without thinking of it every second, but a lot of us are breathing in a stressed, anxious way, which then makes us even more stressed and can even result in getting ill.

A yoga teacher Lucas Rockwood illustrates this fact in his famous TED Talk ‘Change Your Breath Change Your Life’. He says that when we cross the street and have a narrow miss with a passing car, the shock causes our sympathetic nervous system to produce a shallow type of breathing, which is typical for the fight or flight response.

A lot of us are breathing this way – as if we were about to be hit by a car – all day long. From the moment we wake up, to the moment we fall asleep. We are responding to our environment on autopilot, and this can be detrimental to our health. It is no secret that many cases of cancer or other serious diseases are primarily caused by stress and unbalanced functioning of the involuntary nervous system.

Controlled Breathing Benefits

Fortunately, we can considerably improve the quality of our lives if we stop living on autopilot and start taking care of your body and mind more consciously. This includes specific breathing exercises mentioned in this article.

Controlled breathing, when done correctly, can have a highly positive effect on our mind (or moods and states of mind) and body, (e.g. our nervous system and our endocrine system).

It can help us with the following:

  • Changing the pH of our blood

I find it fascinating that the way we breathe can make a difference in our blood’s pH – i.e. being either more alkaline or acidic. The deeper we breathe, the more alkaline our blood becomes. If our breathing is shallow most of the time, it causes carbon dioxide to be trapped in our blood, and that can make our body highly acidic. I often remind myself that cancer thrives in an acidic environment, and this makes me remember to breathe deeply more often!

  • Oxygenating our blood

It is a well-known fact that cancer cannot thrive in a well-oxygenated environment.

  • Lowering our cortisol levels

Lowering our stress level by decreasing the amount of cortisol strengthens our immune system and makes us ‘cold-proof’.

  • Falling asleep and improving the quality of your sleep

I’ll be describing two powerful breathing exercises for falling asleep – feel free to try them tonight!

  • Creating ‘out of the body experiences’

This can be achieved by extreme breathing practices that should always be done under supervision of an experienced guide. However, even the simple techniques described in this post can create a feeling of a mild ‘high’, if not exactly an out of the body state. 

Simple Breathing Techniques for Different Purposes

There are many ways of using breathing for improving our health and state of mind. I have selected a few of my favourite ones – the ones that I have tried and tested and that helped me in different situations.

The techniques are known as:

  • Water Breathing
  • Coffee Breathing
  • Whiskey Breathing
  • 4-7-8 Technique


Water, Coffee and Whiskey Breathing

I guess you’re wondering about the funny names of the first three techniques. They’ve been named like that by a Lucas Rockwood, the yoga teacher who talked about them in the ‘Change Your Breath, Change Your Life’ TED talk.

Of course, L. Rockwood had not invented any of these techniques. They have been known since ancient times as pranayama, which comes from Sanskrit and means control of life force or regulation of the breath.

(The word prana translates as life force, and ayama can be interpreted as expansion, restraint, control, extension or stopping.)

The yoga teacher Lucas Rockwood, however, has decided to call the breathing practices in a rather more amusing, and therefore more easily memorable way. So let us start with the first technique:

drop of water

Water Breathing

This technique will help you release stress and bring you into balance.

When to Do Water Breathing:

Anytime you feel you need to de-stress and feel more balanced.

The Procedure:

  1. Sit back in your chair comfortably, relax your shoulders.
  2. Put your hands on your lap and close your eyes.
  3. Inhale through your nose to the count of four.
  4. Exhale through your nose to the count of four.

If you want the exercise to be really effective, do up to 10 rounds of the inhale/exhale.

You can scroll to 4:09 to watch Lucas Rockwood talk about Water breathing.

How Often Can You Do Water Breathing?

This exercise can be done anytime throughout the day, as many times as you need.

One way to remember this is imagining a bottle of water that you carry with you the whole day and sip from it anytime you feel thirsty; you can use it anytime you feel like and you can’t really overdo it. This is similar to Water breathing – you can ‘carry it’ with you all day and use it whenever you need without worrying about doing too much of it.

How Have I Benefitted From This Exercise?

This exercise has helped me to feel calmer and less stressed in many situations. When something really upsets me, I use this technique in combination with an energy medicine technique called ‘Mellow Mudra’, which I’m describing in my post How to Relieve PMS. I highly recommend learning these two techniques together.

irish whiskey

Whiskey Breathing

One of the techniques, which Lucas Rockwood calls ‘Whiskey Breathing’, is used specifically for falling asleep. Why Whiskey? Some people have a little ‘nightcap’ before going to sleep, as it’s traditionally considered to help with falling asleep.

I personally don’t find Whiskey the best sleep aid; although alcohol can help you fall asleep, it will make your sleep shallower, as alcohol can take several hours to metabolise, and it gives your kidneys and your liver extra job to process the alcohol while you’re asleep. If you like to drink alcohol in the evening, then allow at least an hour to have your last drink before going to sleep. (More on this in my article 20 Ways for Better Sleep.)

Anyway, back from booze to breathing. We’re using this exercise mainly for falling asleep. After about 10 rounds of the Whiskey breathing your heart rate slows, your blood pressure drops, and your parasympathetic nervous system is stimulated, helping you rest and digest better. (This is the opposite of your sympathetic nervous system which governs the fight or flight response.)

We should use this exercise with care – i.e. we should not do it throughout the day because it could make us drowsy or tired.

When to Do Whiskey Breathing:

Right before sleep – when you’re already in your bed.

Do not do this technique during the day because it will make you drowsy.

The Procedure:

  1. Lie down and close your eyes.
  2. Inhale to the count of 4.
  3. Exhale to the count of 8.

Repeat this cycle several times. You can do this cycle 10 times in a row, or until you fall asleep.

You can watch the technique in the video further up – just fast forward to 5:27.

How Often Can You Do Whiskey Breathing?

Make sure you only practice this technique when you need to fall asleep, and not during the day.

How Have I Benefitted from This Exercise?

This has worked as a sleeping aid for me and helped me to enjoy better sleep. I also use it before meditation to get more centered. 

cofee

Coffee Breathing

This breathing technique will stimulate you when you need a kick of energy. And like coffee, you should not over-use it. As Lucas Rockwood says, Coffee breathing is a technique that people get most excited about, but it should be used most sparingly.

Why is that? The technique uses fast, rapid breath that stimulates the sympathetic nervous system, which is related to the fight or flight system. If we do too much of it, we might get overly agitated. (Imagine downing five espressos in a row.)

When to Do Coffee Breathing:

In the morning, and/or in the afternoon. When you need to get in the ‘clean the house, answer emails’ kind of mood and energy.

Important: It is not recommended to do it in the evening if you want to have a good quality sleep!

The Procedure:

Coffee breathing is different from the other techniques he presents. With this technique, we focus only on the exhale. The main point is to push the air out from your lungs in a similar way to sneezing, in a sharp, rapid way.

Do 20 rounds of fast and short out-breaths from your belly.

Try to keep your shoulders relaxed, don’t let them jump up and down. It’s your lower abdomen/diaphragm that should be doing all the work.

The exercise goes as follows – do this through your nose only:

  1. Exhale
  2. Exhale
  3. Exhale
  4. Exhale
  5. Exhale
  6. Exhale
  7. Exhale
  8. Exhale
  9. Exhale
  10. Exhale
  11. Exhale
  12. Exhale
  13. Exhale
  14. Exhale
  15. Exhale
  16. Exhale
  17. Exhale
  18. Exhale
  19. Exhale
  20. Exhale

You can do three rounds of these 20 exhales, ideally in the morning and afternoon, when you feel that you’re getting tired.

In the video further up, scroll to 7:02 to watch Lucas Rockwood explain the mechanics of Coffee breathing.

How Often Can You Do Coffee Breathing?

Not too often – just a few times a day when you need a boost of energy. (Think about coffee – you shouldn’t drink it too often either) Morning and afternoon are ideal times for practicing this. Use it with care so you don’t end up over-agitated, which could even lead to a blackout or a panic attack.

How Have I Benefitted from This Exercise?

For me, this exercise is a life-saver! I do it almost every day when I work on the computer and need a refreshing break. It always fills me with fresh energy.

little girl sleeping

The 4-7-8 Technique

The following method that I’ve learned from Dr. Andrew Weill, can help people with sleeping disorders, such as insomnia, difficulty falling asleep, shallow sleep, or interrupted sleep.

The method is knowns as The 4-7-8 Technique and, like the Water, Coffee, and Whiskey breathing, it is based on the ancient yogic practice of breath control called pranayama (already mentioned further above, but why not having little recap:

Prana = Life Force

Ayama = Regulation, Expansion, Control, Restraint, Pranayama = Control of life force (or Regulation of the breath)

Dr. Andrew Weil talks about the 4-7-8 technique as a ‘natural tranquiliser for the nervous system’.

Many people fall asleep after just one minute of doing this technique, which decreases your tension and allows your body to relax, all of which improves the quality of sleep.

After 2 or 3 months of regular practice you are likely to notice significant changes in your physiology, such as:

  • Your sleep will improve
  • Your digestion will improve
  • Your heart rate and blood pressure will slow down
  • Your blood circulation will increase, so if you’ve suffered from cold hands, they may start to feel warmer thanks to improved circulation
  • You’ll be less susceptible to anxiety and panic attacks

When to Do The 4-7-8 Technique:

Right before going to sleep or before meditation.

The Procedure:

  1. Place the tip of your tongue just behind your upper front teeth and keep it there for the rest of the exercise.
  2. Let all air out first by exhaling.
  3. Inhale through your nose to the count of four.
  4. Hold your breath for the count of seven.
  5. Exhale through your mouth for a count of eight (try to keep your tongue behind your front upper teeth)

Do four rounds of this technique (not more than that).

Watch Dr. Weill demonstrate this technique in the following video. 

How Often Can You Do The 4-7-8 Technique?

For the exercise to be effective, you should do it at least twice a day.

How Have I Benefitted From This Exercise?

Dr. Weill has successfully taught the 4-7-8- technique to patients with severe forms of panic disorder. He presents it as a highly effective anti-anxiety technique as well as a sleep aid, and I can back this up by my won positive experience in both fields.

You can also read more about this technique in my article 20 Tips for Better Sleep.

Recap of All Four Techniques

Water Breathing

Purpose: To de-stress and balance you

Procedure: Inhale to the count of 4, exhale to the count of 4. Do this up to 10 times.

When/How Often: Anytime throughout the day.

Video: Change Your Breath, Change Your Life – Lucas Rockwood  (4:09)

Whiskey Breathing

Purpose: To help you fall asleep

Procedure: Inhale to the count of 4, Exhale to the count of 8. You can do 10 rounds of this, or more if you want to fall asleep.

When/How Often: Right before falling asleep. Not during the day – may make you drowsy.

Video: Change Your Breath, Change Your Life – Lucas Rockwood (5:27)

Coffee Breathing

Purpose: To energise you

Procedure: 3 rounds of 20 short, sharp out-breaths

When/How Often: In the morning and/or in the afternoon when your energy starts dropping or when you need to get going

(e.g. clean the house, answer emails etc.)

Video: Change Your Breath, Change Your Life – Lucas Rockwood (7:02)

The 4-7-8 Method

Purpose: To help you fall asleep, to prevent panic attacks

Procedure: Inhale to the count of 4, Hold to the count of 7, exhale to the count of 8

When: Right before falling asleep or before a sitting meditation

Video: Asleep in 60 Seconds – Andrew Weil

Conclusion

If we can learn to control our breathing, we can dramatically improve our health – from our immune, endocrine, and nervous, system, to our moods and states of mind. The techniques mentioned in this article are simple, effective and available to everyone. Let’s hope the word gets spread and that more people will learn to use them to combat everyday stresses, prevent many health issues, and feel better on the whole. And if you happen to forget about these exercises, at least remember  to breathe deeply more often, to keep your body more alkaline – which can help with preventing cancer!

Share Your Thoughts

I hope you have enjoyed this post, and above all, that you will take some of these breathing techniques with you and use them to improve your health and feel better. I look forward to hearing from you about how it has worked for you. Just leave a comment below – I look forward to reading about your own experience!

BY LUCIE DUN

This site has been built with DIVI, by Elegant Themes.

RECOMMENDED SECTIONS:

Online courses and webinars
Health and Wellbeing Products
Inspirational Books and Audio

Disclaimer: This page contains affiliate links. This means that if you decide to make a purchase through my links, I will earn a small commission at no extra cost to you. (The full Affiliate Disclosure can be read here.) If you’d like to learn more about affiliate marketing, e.g. how to earn extra income from blogging and promoting products you like and would recommend to others, which is what I do, check out Wealthy Affiliate, my favourite platform for online marketers. You can create a free account, which will enable you to make your own website in a few simple steps, and host it with them – free of charge – for as long as you like. You can test it right now by trying their free website builder SiteRubix. Thank you for visiting!

Free starter membership with Wealthy Affiliate

   Let’s keep in touch:

Naturegrooves Logo 19

 in alliance with

Buddhagroove-Logo_website
buddhagroove

The Spleen Meridian

The Spleen Meridian

Spleen Meridian by Welcome Collection

This page is dedicated to the Spleen meridian and several techniques based on Traditional Chinese Medicine for using it to support our health. Although these ancient healing techniques can appear simple, they may cause important shifts in your energy and boost your immunity. Working with the Spleen meridian can sometimes even prevent an illness, e.g. stop an approaching cold from taking hold of you. 

If you are short of time and can’t read the whole article, just watch this short overview of the Spleen meridian, including its pathway which you can trace with your hands, and, by doing so, strengthen the meridian.

The Meridian for Better Immunity and More Joy

The Spleen meridian is an energy pathway with strong nurturing and immunity-boosting qualities. It’s at its peak flow between 9 and 11 am.

The main functions of the spleen (as an organ) is the support of our immune and cardiovascular systems.  The spleen is responsible for cleansing our blood and aiding our immunity. It removes old red blood cells and produces (and stores) white blood cells known as lymphocytes. The lymphocytes have an important function of cleansing bacteria from the blood in the spleen. They also facilitate tissue healing and other important immune responses throughout our whole body. 

The Pathway of Spleen Meridian

The Spleen meridian begins at the big toe, in the lower, proximal part of the nail (see the illustration).

Spleen 1 Acupressure Point

The energy pathway then continues to flow up the inner leg, across the groin, the stomach, and through the diaphragm.

The path of the Spleen (SP) meridian is marked in red colour on the following diagram.

Spleen meridian line front view

Note: After the start of the journey on the big toe, (and before continuing to flow up the front of the body) the Spleen meridian pathway goes up the inner leg for a bit, which you can see on the picture below:

Spleen meridian line back view

Important: This diagram shows the meridian pathway on only one side of the body. This is for clarity purposes only; in reality, it flows as a pair through both sides of the body, right and left.

Ancient Prints Depicting Meridian Pathways

It is fascinating to look at ancient Chinese prints and paintings that depict meridian pathways and compare them with modern acupuncture and acupressure diagrams.

We now have devices that are able to detect meridians including their acupressure points. What’s fascinating is that they are almost exactly the same as in those ancient illustrations.

The master energy medicine practitioner Donna Eden was born with the ability to see energies, and she had been able to detect meridian pathways even before she learned they existed!

Spleen Meridian by Welcome Collection
Kidney Meridian by Wellcome Collection

Compare the pathways marked in these ancient prints with the modern-day diagram above it.

If Spleen Meridian is Out of Balance

If the spleen (both as an organ and energetic pathway) is out of balance, it can physically manifest by low immunity, susceptibility to colds, digestive problems (such as loose stools), weakness of the limbs, and fatigue.

An imbalance of the Spleen meridian can also manifest in the emotional areas: You can become over-worried, depressed, have low self-esteem, being too clingy,  and wallow in self-pity.

Fortunately, ancient medicine has left us with a heritage of techniques for balancing the Spleen meridian, which will allow us to enjoy a better immune system, feeling more joyful, and having higher self-esteem. Yes, self-esteem is not only ‘in your head’, but can get a boost by strengthening this specific energy pathway!

Techniques for Balancing Spleen Meridian

If you suffer from any of the symptoms and issues mentioned above, try the following techniques: 

  • Trace Spleen meridian
  • Flush Spleen meridian
  • Work with the acupressure points of Spleen meridian

Tracing Spleen Meridian

Tracing Spleen meridian will help you boost your immunity, vitality, get your energy going, and aid with removing toxins out of your body.

See the master practitioner of energy medicine Donna Eden (the one who can see energies) trace the Spleen meridian in this video (scroll to 1:44).

Flushing Spleen Meridian

How to flush a meridian:

  • Trace it backward once
  • Trace it forward three times

 (If you don’t know how to trace it, watch the video above.)

Working with the Acupressure Points of Spleen Meridian

There are three ways we can work with the acupressure points:

  • Sedate
  • Strengthen
  • Use the Three-Point Technique

Below I am showing diagrams that will teach you how to sedate or strengthen the Spleen meridian, according to your needs. 

Sedating Spleen Meridian

Generally, we don’t sedate the Sppeen meridian too often, because usually it needs to be strengthened. However, as you’ll see further down, sedating it can still be used for certain situations.

Step 1 – Sedate the Spleen Meridian:

Sedate (relax) the Spleen meridian by sending its excess energy to the next meridian, which is Lung. You’ll see how the flow works on the wheel diagram (The Five Elements Wheel) further down.

The Procedure:

Gently hold the following two points (Spleen 5 and Lung 8) for 2 – 3 minutes. Use the tips of your fingers (preferably the index or the middle finger).

Do this one side of the body first, (e.g. on your right foot + right arm).

Repeat the same procedure on the other side of the body (your left foot + left arm), also for 2 – 3 minutes.

Spleen 5 acupressure point
Lung 8 acupressure point

What Is Happening on The Five Elements Wheel:

Earth element (Spleen meridian) flows into Metal element (Lung meridian).

This means that Spleen meridian is being freed from excess energy by sending it to Lung meridian.

You can also view it the other way – the helpful assistant Lung is ‘vacuuming’ excess energy from the overcharged Spleen meridian.

You can see this happening on the wheel (from yellow to white, inside the circle):

Spleen to Lung Five Elements Cycle

Step 2 – Stabilise the Energy Flow by Holding the Control Points:

We now need to stop the flow of energy from the previous meridian. We’ll be stabilizing the shift in energy by holding the so-called control points.

The Procedure:

Gently hold the following two points (Spleen 1 and Liver 1) for 1,5 minutes.

Do this on both sides of the body (like in the previous step).

Splleen 1 and Liver one acupressure points

What is happening on The Five Elements Wheel:

Wood element (Liver) controls Earth element (Spleen).

This means that Liver meridian will ‘stop’ the flow of energy from the previous step, therefore preventing the Spleen meridian from having too much energy taken away. This intervention of the controlling element (Wood) will stabilise the energies.

You can see this happening on the wheel (from green to blue, inside the circle):

Liver to Spleen Five Elements Cycle

Strengthening Spleen Meridian

Step 1 – Strengthen the Spleen Meridian 

This is one of the most important acupressure practices that you can use for self-healing.

How to proceed:

Strengthen the Spleen meridian by borrowing some energy from the previous meridian (i.e. Heart meridian).

The Procedure:

Gently hold the following two points (Spleen 2 and Heart 8) for 2 – 3 minutes. Use the tips of your fingers (ideally the index or the middle finger).

Do this one side of the body first, (e.g. your right side) and then repeat the same procedure on the other side of the body, also for 2 – 3 minutes.

Spleen 2
Heart 8 acupressure point

What Is Happening on The Five Elements Wheel:

Fire element (Heart) flows into Earth element (Spleen).

This means that Heart meridian is strengthening the neighbouring Spleen meridian by sending its energy into it (or flowing into it).

Or, if you want,  you can view it the other way – Spleen is getting some extra energy from its adjacent Heart meridian.

You can see this happening on the wheel (from red to yellow, inside the circle):

Heart to Spleen Five Elements Cycle

Step 2 – Stabilise the energy flow by holding the control points:

Gently hold the following two points (Spleen 1 and Liver 1) for about 1,5 minutes.

As in the previous step, do this on both sides of the body.

Splleen 1 and Liver one acupressure points

What Is Happening on The Five Elements Wheel:

Wood element (Liver) controls Earth element (Spleen).

Liver meridian will control the flow of energy from the previous step, therefore preventing the Spleen meridian from taking too much energy from the Heart meridian. 

You can see this happening on the wheel (from green to yellow, inside the circle):

Liver to Spleen Five Elements Cycle

You have probably noticed that this is the same procedure as when we were holding the control points after the Sedating procedure in the first example. The control points are always the same after sedating and strengthening a meridian.

Three-Pointing Spleen Meridian

The Three Point Technique is a combination of sedating and strengthening a meridian in one session. Sometimes a meridian needs to be cleared of stale or toxic energies first in order to receive strengthening energies. This means that we sedate it first to move the old energies out, and then strengthen it. In the end, we use the control points to stabilise the shift.

We often use the Three-Point technique to treat hormonal imbalances, such as during PMS or menopause.

Step 1 – Sedate the Spleen Meridian:

Sedate (relax) the Spleen meridian by sending its excess energy to the next meridian, which is Lung. You’ll see how the flow works on the wheel diagram (The Five Elements Wheel) further down.

The Procedure:

Gently hold the following two points (Spleen 5 and Lung 8) for 2 minutes. Use the tips of your fingers (preferably the index or the middle finger).

Do this one side of the body first, (e.g. on your right foot + right arm).

Repeat the same procedure on the other side of the body (your left foot + left arm), also for 2 minutes.


Spleen 5 acupressure point
Lung 8 acupressure point

What Is Happening on The Five Elements Wheel:

Earth element (Spleen meridian) flows into Metal element (Lung meridian).

This means that Spleen meridian is being freed from excess energy by sending it to Lung meridian.

You can also view it the other way – the helpful assistant Lung is ‘vacuuming’ excess energy from the overcharged Spleen meridian.

You can see this happening on the wheel (from yellow to white, inside the circle):

Spleen to Lung Five Elements Cycle

Step 2 – Strengthen the Spleen Meridian 

After sedating it, you will strengthen the Spleen meridian by borrowing some extra energy from the previous meridian (i.e. Heart meridian).

The Procedure:

Gently hold the following two points (Spleen 2 and Heart 8) for 2 minutes. Use the tips of your fingers (ideally the index or the middle finger).

Do this one side of the body first, (e.g. your right side) and then repeat the same procedure on the other side of the body, also for 2 minutes.


Spleen 2
Heart 8 acupressure point

What Is Happening on The Five Elements Wheel:

Fire element (Heart) flows into Earth element (Spleen).

This means that Heart meridian is strengthening the neighbouring Spleen meridian by sending its energy into it (or flowing into it).

Or, if you want,  you can view it the other way – Spleen is getting some extra energy from its adjacent Heart meridian.

You can see this happening on the wheel (from red to yellow, inside the circle):

Heart to Spleen Five Elements Cycle

Step 3 – Stabilise the energy flow by holding the control points:

Gently hold the following two points (Spleen 1 and Liver 1) for about 1 minute. As in the previous step, do this on both sides of the body.

Splleen 1 and Liver one acupressure points

What Is Happening on The Five Elements Wheel:

Wood element (Liver) controls Earth element (Spleen).

This means that Liver meridian will ‘stop’ the flow of energy from the previous step, therefore preventing the Spleen meridian from having too much energy taken away. This intervention of the controlling element (Wood) will stabilise the energies.

You can see this happening on the wheel (from green to yellow inside the circle):

Liver to Spleen Five Elements Cycle

Learn More About Meridians and Acupressure Points

I hope you enjoyed reading this page. If you’d like to find out a bit more about acupressure points, I highly recommend getting the folding laminated chart pictured below.  It shows every single acupressure point on our body, including very poetic ancient Chinese names for each important point. I’ve found it a very valuable study guide, especially during my Energy Medicine Foundation Course.

accupresure points and meridian chart 2

Share Your Thoughts

It would be nice to hear about your experience. Have you used the techniques mentioned here, and if so, with what results? Let me know your thoughts, questions, or other comments in the comments below and I look forward to getting back to you soon. Be well!

BY LUCIE DUN

This site has been built with DIVI, by Elegant Themes.

RECOMMENDED SECTIONS:

Online courses and webinars
Health and Wellbeing Products
Inspirational Books and Audio

Disclaimer: This page contains affiliate links. This means that if you decide to make a purchase through my links, I will earn a small commission at no extra cost to you. (The full Affiliate Disclosure can be read here.) If you’d like to learn more about affiliate marketing, e.g. how to earn extra income from blogging and promoting products you like and would recommend to others, which is what I do, check out Wealthy Affiliate, my favourite platform for online marketers. You can create a free account, which will enable you to make your own website in a few simple steps, and host it with them – free of charge – for as long as you like. You can test it right now by trying their free website builder SiteRubix. Thank you for visiting!

Free starter membership with Wealthy Affiliate

   Let’s keep in touch:

Naturegrooves Logo 19

 in alliance with

Buddhagroove-Logo_website
buddhagroove

The Best Back Massage Tool

The Best Back Massage Tool

If you’re looking for the best back massage tool that doesn’t require a power supply, you may enjoy my review of The Original Backnobber II. There was a time I would spend a lot of time on the road and suffered from back pain as a consequence of carrying musical equipment around. Fortunately, a friend had recommended this simple but powerful S-shaped tool that has been in and out of my travel bag since. In this review I’ll walk your through the good as well as the less desirable aspects of this handheld massager.

Affiliate Disclosure: As an Amazon Associate I earn from qualifying purchases. If you make a purchase through my links, I will earn a small commission at no extra cost to you. The full disclosure can be accessed here. Thank you for your support!

backnobber hand-held massaging device

Product: The Original Backnobber ii

Available from: Amazon UK / US / EU

Main Benefits: Pain Relief/Relaxation/Clearing Out Toxins

Price: £42.83

Dimensions: 55.88 x 33.02 x 2.54 cm

Weight: 453.59 Grams

Power Source: Not needed

My Rating: 8.8 out of 10

Overview

The Backnobber II is a popular handheld tool for self-massage, mostly for shoulder and back areas. It is capable of managing muscle pain, as well as clearing toxins out of the body by stimulating neurolymphatic reflex points and encouraging the lymph flow.

The tool is made of a strong and highly durable polymer-fiberglass composite. The ergonomic S-shape of the massager allows you to easily reach your back, shoulders, neck, and other areas to massage and manage muscle pain.

It has a special locking mechanism in the middle, so you can take it apart easily. This practical feature of splitting the device in two (by pressing the button in the middle) makes it easy to carry around or store at home.

backnobber hand-held massaging device
hangsun percussion massager

How to Use the Backnobber

The Backnobber is best used the following way:

Hook one of its curves over your shoulder or under your arm. You then use its leverage to apply firm, deep pressure to the points on your muscles that need deep treatment.

I personally find it very easy to manipulate. I mainly use it to treat the muscles of my back, shoulders, or the sides of my neck. Most frequently, I hook the S-shaped Backnobber over my shoulder and massage the areas of my upper back.

backnobber hand-held massaging device

It’s quite incredible how much healthy pressure can be achieved by gentle pushing against the device. The type of pressure that would make a massage therapist’s knuckles sore can be done by you with almost zero effort.

Holding the Backnobber Horizontally

As I’ve just mentioned, you can reach your back muscles from your side by holding the Backnobber horizontally. You can start at the top and then continue all the way down your spine. Do this from both sides.

You will be pressing a large number of important acupressure points that affect various systems in your body and clear out toxins by making the lymph flow more easily.

Massaging Lower Back

To reach my lower back, I hold the Backnobber horizontally so it can reach the sides of my back. Again, I use the device as leverage to apply pressure to the points of my choice.

Lying Down

My favourite way of using the Backnobber is lying down on my back and sliding the ‘snake’ under my back. Then I just gently push down the top part and can feel a nice deep pressure. It almost feels as if the device is working on its own.

This is one of the most effective ways to clear toxins from your body and release stale energy. You’ll notice your mood lifting up as well.

backnobber hand-held massaging device

Which End to Use?

The Backnobber has two ball-shaped ends of slightly different sizes. I tend to use the smaller end for hanging over my shoulder, and the larger end for massaging the muscles of my lower back (I reach these points from the side).

Watch the Instructional Video

You can watch the manufacturer’s video explaining how the device works and what the benefits are. Just watch out for the skeleton in the background..!

When Do I Use it Most?

The Backnobber has been helping me relax my muscles in various situations. I use it after long drives, carrying heavy luggage, vacuuming the house, gardening, or long sitting sessions. As soon as my back muscles get a bit stiff and achy, I reach for the Backnobber and target the affected area.

Get Creative

You can get quite creative with the Backnobber – for example, you can even use it for a foot massage. I’ve even read some reviews which made me gasp in disbelief over people’s ‘overcreativity’ with using the Backnobber – I don’t think it’s necessary to get into further details here..!

backnobber hand-held massaging device

Self-administered Spinal Flush

The Backnobber is particularly great for a self-administered Spinal Flush technique. It’s a technique used in energy medicine and it’s incredibly relaxing and rejuvenating.

Find out more in my article Two Simple Techniques for Deep Relaxation where I describe the procedure, and where you can also watch Donna Eden showing the technique in a video called  How to Connect with Your Partner Using Energy medicine. The Spinal Flush is really worth learning, and you can either use your hands or the Backnobber device.

PROS:

  • The Backnobber ii is capable of a powerful and effective massage without the need of a power supply.
  • It’s easy to hold, and not too heavy.
  • It’s most convenient for travel, because it splits into two parts and doesn’t take much space in your bag.
  • With your Backnobber, you’ll also get an illustrated user guide full of stretching and strengthening exercises.

Backnobber User Guide

CONS:

  • The Backnobber may not be every effective if you don’t know how to use it – for example, if you don’t place it on the required areas properly, or if you don’t apply enough pressure.
  • Some users have found it unstable and wobbly, with the locking mechanism not working properly.
  • You can’t fully relax while using it because you have to operate it and apply some pressure/

Note: In order to get the best out of the Backnobber, I highly recommend watching the instruction video and read the user manual that comes with the device.

Reviews from Other Customers

Let’s have a look at some reviews from Amazon customers. I’ve selected a variety of good and bad ones, and I’ll comment on each one. It’s always helpful to hear different opinions of different customers because you make your own decision. So here we go, 12 different reviews from the best to the worst:

backnobber hand-held massaging device
Backnobber Review

My opinion: The Backnobber is indeed a highly effective device for trigger point relief. I’m glad to see that a rehab nurse has endorsed it.

Backnobber Review

My opinion: What a lovely outcome for this man. It’s great to hear that such a simple device can save someone a trip to a chiropractor or a massage therapist! 

Backnobber Review

My opinion: As Sarah K. points out, the Backnobber allows you to reach places on your back you would find it hard to get to otherwise. This is thanks to its S-shape.  You can detach it very easily by splitting into two parts. One of the other reviewers were complaining that this feature makes it unsteady and wobbly, but I don’t find that the case. The device also comes with quite a detailed booklet full of useful tips, so you can make the best out of your Backnobber.

Backnobber Review

My opinion: This reviewer mentions that applying the pressure hurts a bit, which is what it is supposed to do in order for it to be effective. And in my experience., it is capable of loosening the stiff muscles quite quickly.

Backnobber Review

My opinion: The two different sizes of the ends of the Backnobber is a feature I particularly like; it makes the device quite versatile. Like this man, I have also tried lying on tennis balls in the past but rather than finding it effective, I would end up frustrated whenever the balls would roll away. The Backnobber eliminates this problem completely.

Backnobber Review

My opinion: The Backnobbers probably come in many different batches. The one I have feels really sturdy and does not wiggle. If you do get one that feels loose, return in at once and ask for a replacement.

Backnobber Review

My opinion: I agree about the Backnobber being great for targeting specific pressure points or muscle knots, and that it is not to be understood as a substitute for the type of massage where you can fully relax, especially when being massaged by someone else or by a massage chair.

Backnobber Review

My opinion: It’s not nice reading about this unfortunate man near-accident. As he is a strong man and seemingly applies all his strength while using this device, it is possible that the device cannot withstand so much pressure. I would definitely recommend this man to get a hand-held percussion massager instead!

Backnobber Review

My opinion: This should definitely not happen with the Backnobber. I have had mine for years and it always kept holding together very well, and never snapped.  It is a pity that in this case it passed the return window and the customer could not claim his/her money back. I would always test the device excessively in the first few days after receiving it, to ensure that I got a quality product and not an item from a bad batch.

Backnobber Review

My opinion: There are many types and causes of muscle pain. Sometimes the Backnobber can be effective, other times not. As with everything, it is a matter of trial and error, and perhaps the Backnoebber is not the best tool for this person. It’s also possible that the reviewer has not been persistent enough or did not use the correct angle. He/she mentions that a percussion massager, which is probably better in this case. I have one and can’t praise it enough – you can check my review here.

Backnobber Review

My opinion: This is interesting because I’ve never found it to be ‘slippery’. I reckon it also depends on what type of clothing you wear while using it. If you have something heavily synthetic on, it is likely to be sliding about more than if you wear cotton or linen, or materials that have a certain amount of resistance.

Backnobber Review

My opinion: Erm…sorry to hear that! 

Conclusion

As a frequent user of the Backnobber, I would personally recommend it to anyone who’d like to relax their back, shoulder, or neck muscles, while being ok with having to hold it and manipulate it. After all, the technique of lying on one’s back and using it as leverage requires almost zero effort and is highly effective.

However, as seen from the reviews, the Backnobber might not suit everyone. If you’d prefer something that works on its own, then get a handheld powered device, such as a percussion massager. You can read my review of one of these, called Hangsun Percussion Massager, here.

backnobber-ii

The Original Backnobber ii

Available at: Amazon UK / US /EU

Share Your Thoughts

If you like the features of The Original Backnobber II, and think you may find it useful, try it out and let me know in the comments under this post how it’s working for you and what your favourite techniques are.

BY LUCIE DUN

This site has been built with DIVI, by Elegant Themes.

RECOMMENDED SECTIONS:

Online courses and webinars
Health and Wellbeing Products
Inspirational Books and Audio

Disclaimer: This page contains affiliate links. This means that if you decide to make a purchase through my links, I will earn a small commission at no extra cost to you. (The full Affiliate Disclosure can be read here.) If you’d like to learn more about affiliate marketing, e.g. how to earn extra income from blogging and promoting products you like and would recommend to others, which is what I do, check out Wealthy Affiliate, my favourite platform for online marketers. You can create a free account, which will enable you to make your own website in a few simple steps, and host it with them – free of charge – for as long as you like. You can test it right now by trying their free website builder SiteRubix. Thank you for visiting!

Free starter membership with Wealthy Affiliate

   Let’s keep in touch:

Naturegrooves Logo 19

 in alliance with

Buddhagroove-Logo_website
buddhagroove

Nada Chair Review

Nada Chair Review

Several years ago, while suffering from lower back pain, I was recommended by a physiotherapist to get a lower back support belt. Maintaining a correct posture is crucial for preventing back pain, but it is not easy to always remember to stand or sit straight. Fortunately, there are devices such as back support belts that can provide considerable relief for the back, and alleviate pain caused by stress or incorrect posture. In this post, I’ll be reviewing the Nada Chair back support.

Affiliate Disclosure: As an Amazon Associate I earn from qualifying purchases. If you make a purchase through my links, I will earn a small commission at no extra cost to you. The full disclosure can be accessed here. Thank you for your support!

Back Up back support by Nada Chair

Product: Nada Chair Back-Up

Available from: Amazon

Main Benefits: Pain Relief/Relaxation/Correct Posture

Price: $49.00 

Dimensions: 11.7 x 6.9 x 2.5 inches

My Rating: 8.8 out of 10

Nada Chair Back-Up: A Simple Device for Back Pain Relief

There was a period when I suffered from quite intensive back pain – mainly in the gigging season when I used to carry my keyboard and amplifier around frequently. The pain would often last for days.

A discovery of that year was an inconspicuous, but surprisingly effective  device called ‘Back-Up’, made by a company ‘Nada Chair’, who, as I later found out, holds the World Chiropractic Alliance’s endorsement, and, as I have found out, quite rightly!

This deceptively simple accessory provides great support for the lower back and eases the general strain on the back. It allows you to sit comfortably for a long time while helping you maintain the correct posture.

Description

The Nada-Chair is essentially a lower-back support resembling a flat padded pillow. The back support is connected with two straps that you place around (or just under) your knees. The length of the straps is adjustable; the shorter you make the straps, the more tension you’ll get. The area that gets hooked around your knees is also padded for greater comfort.

nada chair back up for water sports

A Wide Range of Users

It is a highly effective device for anyone with chronic back pain or strained back muscles, pregnant women, people who spend long hours sitting or driving. It has even been used by NASA astronauts because of its ability to decrease back pain caused by microgravity. 

nada chair back up for flying

Practical and Portable

I remember carrying it everywhere because it’s so practical. It folds into a pouch, so it’s easily portable and fits into a small shoulder bag. I would even take it with me when visiting friends and use it while chilling on the sofa. Needless to say, it quickly became a hit amongst all the back-pain sufferers. And in my case, after about a week of daily use, my back pain subsided.

How Does Nada Chair Work – And Why is it called a ‘Chair’?

The Nada-Chair is known as the ‘chair that you wear’; Whenever you move forward or backward while sitting, the Nada-Chair will follow your body. This means that even if you move, the Nada-Chair will keep supporting your lower back in a firm but adjustable way.

In a way, the Nada-Chair acts like an extra muscle that never gets tired. While you are wearing the device, your knees (with the strap around them) will be stabilizing the pelvis. The stabilized pelvis will become a stable foundation on which your spine can rest effortlessly, with its natural curves restored.

nada chair back up with mri scan

What Others Have Said About Nada Chair

Here are a few reviews from a selection of Amazon customers who are happy with the product. One of them showed it to his/her chiropractor who is now recommending it to his patients. A user called Garland rightly recommends taking some time with adjusting the Nada Chair correctly so it doesn’t become uncomfortable. (There’s a video further down with detailed instructions on how to wear it.) 

Nada Chair Reviews

How to Use Nada Chair Back-Up:

The Nada-Chair is very simple to use. You just strap it around your knees and lower back. This creates stable back support and often provides immediate relief from the pain. And although it is strapped around your lower back, it can reduce pain in both the lower and upper back.

Here is an instructional video from the Nada Chair website:

It’s also quite fun wearing it – you can shorten or lengthen the straps as you want, and the more you shorten it, the more you can ‘swing’ in it!

PROS

Effectiveness

The Nada-Chair is effective and can provide fast back pain relief

Portability

One of the biggest plusses of The Nada-Chair is its portability and light weight. It can be folded into a relatively small pouch that fits into a standard handbag, which makes it very convenient and you may find yourself carrying it with you just about everywhere!

Affordability

The price of the Nada-Chair is, to my mind, very reasonable, provided its proven effectiveness and quality.

CONS

It May Put Stress on the Knees

Although the Nada Chair webiste doesn’t say so, I’ve heard from several sources (including a yoga teacher) that the pressure from wearing the straps for too long may put stress on the knees. As long-term sitting is not healthy anyway, I would keep the strap on for 15-20 minutes maximum, and then take a break or at least stretch the legs.

It Can Take to Learn to Use Properly

It can take some time to find your ideal position in the device and feel comfortable with it.

The Straps Sometimes Twist

The straps sometimes get twisted around the knee support part, which can be annoying.


Conclusion

As a frequent user of Nada-Chair, who has experienced back-pain relief after using it, I do recommend giving Nada-Chair a go.

However, this device may not suit everyone, as it requires a bit of patience when it comes to adjusting the straps and finding a correct, comfortable position. Not wearing it properly may be counterproductive; if your pelvis is not properly supported, you may end up slouching.

It’s also a pity that it doesn’t come with a complimentary part that would support the upper back at the same time, like, for example, this adjustable upper back brace.

upper back strap for better posture

A two-in-one deal would be ideal, I think! Correct posture of shoulders is very important, not the least because of the amount of oxygen we breathe in. A posture can also have a direct effect our mood and self-esteem.

Overall, I’m still a great fan of the Nada-chair as it has helped me many times to ease my back pain. I would mainly recommend it to two groups of people:

1) The ones who spend many hours sitting, either behind a computer, on the plane, or behind a counter, etc.

2) People who experience long-term back strain, like pregnant women or people who often have to carry heavy objects.

nada chair back up for pregnant women

If you belong to one of these groups, give Nada-chair a go and see how you feel after you’ve figured out your ideal position. You should feel relaxed but your back should be stabilised. Above all, I hope that you’ll enjoy wearing it as much as I have done!

Nada Chair Back-Up lower back support

Nada Chair Back-Up

Available at Amazon

Your Opinion

I would love to hear about your thoughts about Nada Chair or similar kind of back support. Feel free to share your thoughts or ask any questions in the comments below and I look forward to replying to you soon.

BY LUCIE DUN

This site has been built with DIVI, by Elegant Themes.

RECOMMENDED SECTIONS:

Online courses and webinars
Health and Wellbeing Products
Inspirational Books and Audio

Disclaimer: This page contains affiliate links. This means that if you decide to make a purchase through my links, I will earn a small commission at no extra cost to you. (The full Affiliate Disclosure can be read here.) If you’d like to learn more about affiliate marketing, e.g. how to earn extra income from blogging and promoting products you like and would recommend to others, which is what I do, check out Wealthy Affiliate, my favourite platform for online marketers. You can create a free account, which will enable you to make your own website in a few simple steps, and host it with them – free of charge – for as long as you like. You can test it right now by trying their free website builder SiteRubix. Thank you for visiting!

Free starter membership with Wealthy Affiliate

   Let’s keep in touch:

Naturegrooves Logo 19

 in alliance with

Buddhagroove-Logo_website
buddhagroove

Pin It on Pinterest