Acupressure Strengthening and Sedating Points

Contents:
- Techniques for Balancing a Meridian
- Tracing a Meridian
- Flushing a Meridian
- Sedating a Meridian
- Strengthening a Meridian
- Three-pointing a Meridian
- The Five Elements Wheel
- An Example of Working with Acupoints
- ACUPRESSURE SEDATING AND STRENGTHENING POINTS
- The Spleen Meridian
- The Heart Meridian
- The Small Intestine Meridian
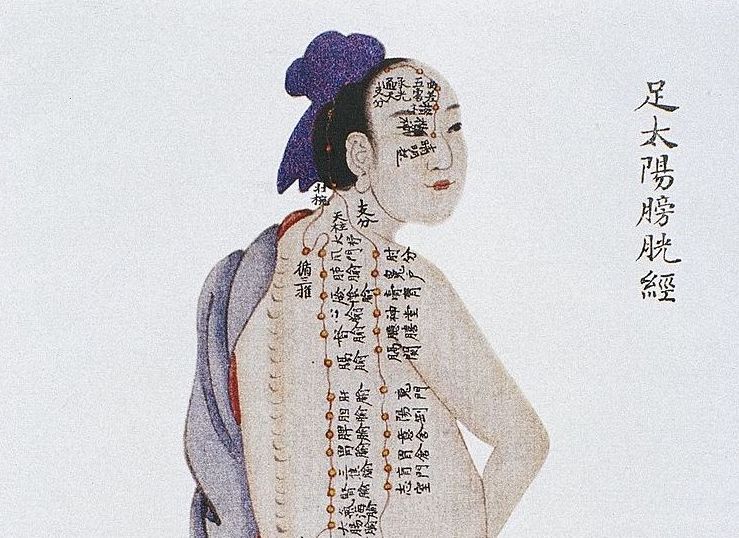
- The Bladder Meridian
- The Kidney Meridian
- The Pericardium Meridian
- The Triple Warmer Meridian
- The Gallbladder Meridian
- The Liver Meridian
- The Lung Meridian
- The Large Intestine Meridian
- The Stomach Meridian
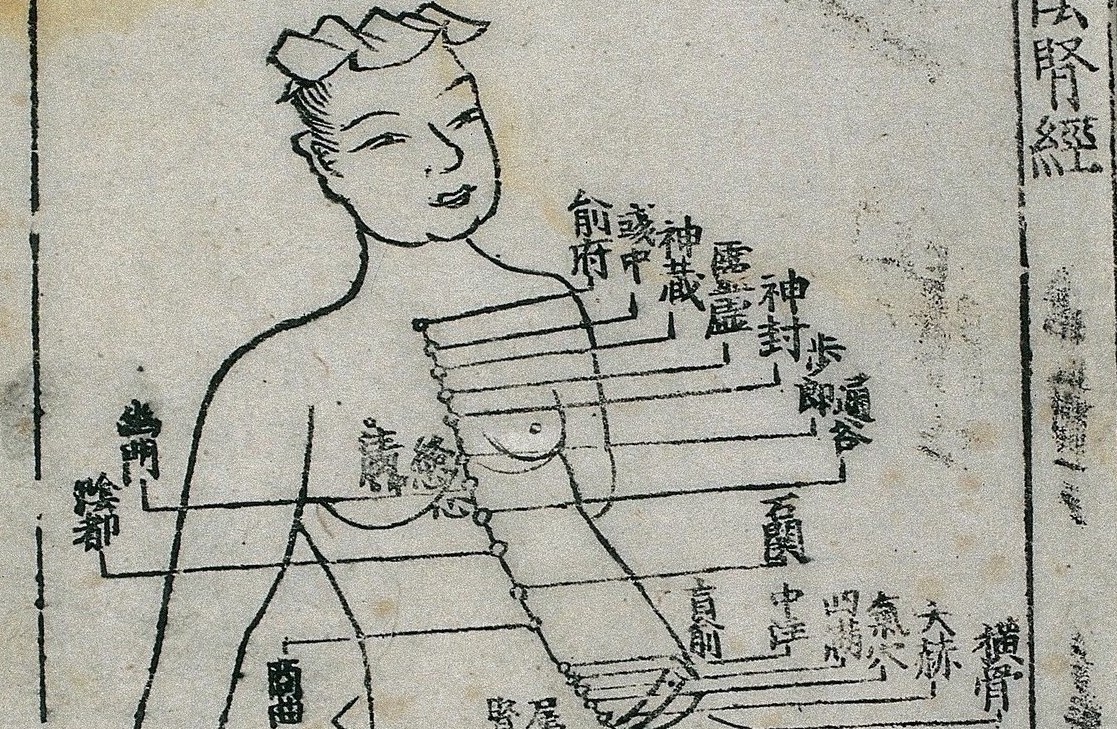
One of the most exciting things about holistic healing is the fact that we can use our hands to facilitate healing processes in our bodies. This is often done by working with meridians (energetic pathways throughout our body) and their acupoints.
On this page, you will find a list of acupressure sedating and strengthening points that you can use for addressing specific issues, such as diminishing pain, strengthening your immunity, boosting your energy, balancing your hormones etc. These techniques are based on the systems of Traditional Chinese Medicine.
Feel Better by Balancing Your Meridians
Working with your meridians can often make you feel better in minutes. Strengthening the Spleen meridian, for example, can lift you from feeling down, boost your immunity, or even stop an approaching cold from taking hold of you. Sedating the Kidney meridian can diminish lower back pain.
I work with my meridians frequently, and it’s always very encouraging to feel the energetic shifts in my body, experience pain relief, and notice an improvement in my overall state. Equally, it’s been very rewarding to be able to help others diminish their pain or improve their state in general.
Techniques for Balancing a Meridian
To balance a meridian, you can use the following techniques:
- Trace a meridian
- Flush a meridian
- Work with the acupressure points of a meridian
Tracing a Meridian
Watch the master practitioner of energy medicine Donna Eden trace all the 14 meridians.
Flushing a Meridian
How to flush a meridian:
- Trace it backward once
- Trace it forward three times
(If you don’t know how to trace a meridian, watch the video above.)
Working With the Acupressure Points of a Meridian
There are three ways we can work with the acupressure points:
- Sedate
- Strengthen
- Use the Three-Point Technique
Further down the page are diagrams that will show you how to sedate or strengthen any meridian, according to your needs.
How Do I Know What Acupoints to Use for a Particular Issue?
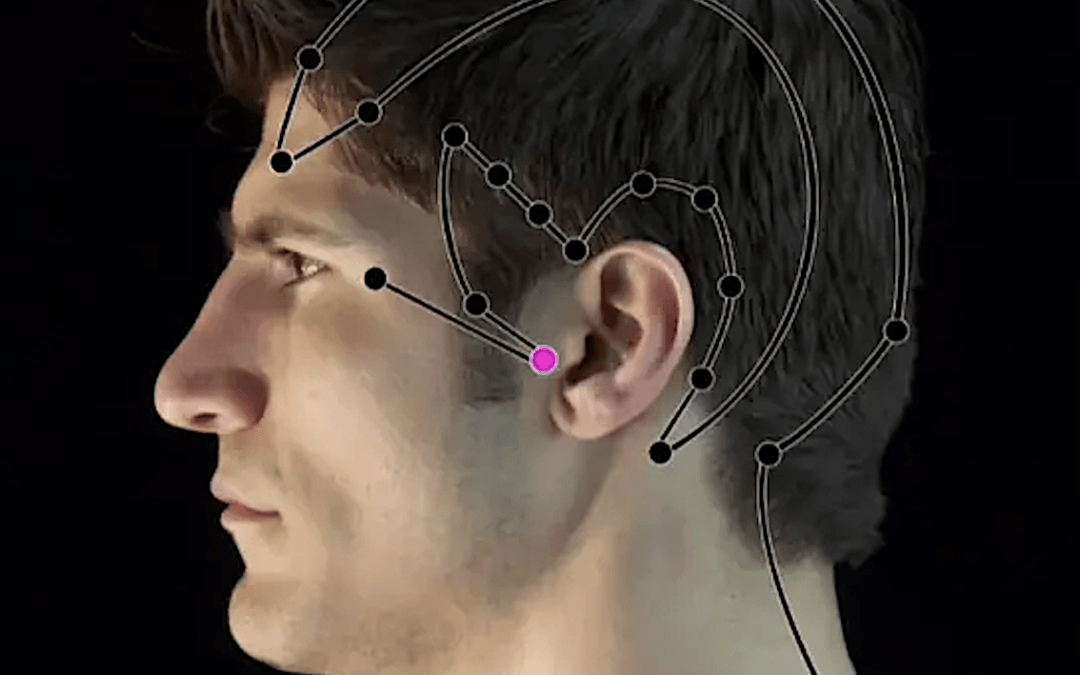
I highly recommend an app called POINTS which list a long number of conditions and the treatment protocols – e.g. of you have a headache, you will get a combination of acupoints that you can hold or massage to alleviate your pain. (You can read my review of the POINTS app here)
Sedating a Meridian
Step 1 – Sedate the Meridian
Sedate (relax) a particular meridian by holding its sedating points. You will be sending its excess energy to the next meridian. (You’ll see how the meridian flow works on The Five Elements Wheel diagram further down.)
The Procedure:
Gently hold the sedating points for 2 – 3 minutes. Use the tips of your fingers (preferably the index or the middle finger).
Do this one side of the body first, (e.g. on your right foot + right arm).
Repeat the same procedure on the other side of the body (your left foot + left arm), also for 2 – 3 minutes.
Step 2 – Stabilise the Energy Flow by Holding the Control (Stabilizing) Points:
We now need to stop the flow of energy from the previous meridian. We’ll be stabilizing the shift in energy by holding the control points.
The Procedure:
Gently hold the two control points for 1,5 minutes.
Do this on both sides of the body.
Strengthening a Meridian
Step 1 – Strengthen the Meridian
Strengthen the meridian by holding its strengthening points. You will be ‘borrowing energy’ from the previous meridian (see the Flow Wheel lower down)
The Procedure:
Gently hold the strenggetning points for 2 – 3 minutes. Use the tips of your fingers (ideally the index or the middle finger).
Do this one side of the body first, (e.g. your right side) and then repeat the same procedure on the other side of the body, also for 2 – 3 minutes.
Step 2 – Stabilise the Energy Flow by Holding the Control Points:
Gently hold the control points for about 1,5 minutes.
As in the previous step, do this on both sides of the body.
Three-Pointing a Meridian
The Three Point Technique is a combination of sedating and strengthening a meridian in one session. Sometimes a meridian needs to be cleared of stale or toxic energies first in order to receive strengthening energies. This means that we sedate it first to move the old energies out, and then strengthen it. In the end, we use the control points to stabilise the shift.
We often use the Three-Point technique to treat hormonal imbalances, such as during PMS or menopause. (In these cases it’s Kidney, Liver, and Spleen).
Step 1 – Sedate the Meridian:
Sedate (relax) the meridian by sending its excess energy to the next meridian.
The Procedure:
Gently hold the sedating points for 2 minutes. Use the tips of your fingers (preferably the index or the middle finger).
Do this one side of the body first, (e.g. on your right foot + right arm).
Repeat the same procedure on the other side of the body (your left foot + left arm), also for 2 minutes.
Step 2 – Strengthen the Meridian
After sedating it, you will strengthen the meridian by holding its strengthening points.
The Procedure:
Gently hold the strengthening points for 2 minutes. Use the tips of your fingers (ideally the index or the middle finger).
Do this one side of the body first, (e.g. your right side) and then repeat the same procedure on the other side of the body, also for 2 minutes.
Step 3 – Stabilise the energy flow by holding the control (stabilising) points:
Gently hold the control points for about 1 minute. As in the previous step, do this on both sides of the body.
The Five Elements Wheel
The Five Elements Wheel, used in Traditional Chinese medicine, shows how meridians relate to each other and what elements of nature they represent. It is an excellent reference for working with meridians and their acupoints. For example, when you are holding strengthening points of a meridian, you are sending energy to the meridian from the previous meridian.
When you are holding the sedating points, you are sending energy from the particular meridian to the next meridian on the wheel.
Finally, when you are holding the control points (stabilising points), the flow of energy of particular meridian will be stabilised by another meridian.

An Example of Working with Acupoints of a Meridian
Let’s see an illustrated example of working with a meridian. Let’s say we want to strengthen the Spleen meridian to boost your immunity or to lift you from feeling low. I have selected this particular meridian because this is one of the most important acupressure practices that you can use for self-healing. It is one of my favorite methods for improving my immunity and lifting my spirits.
Strengthening Spleen Meridian
Step 1 – Strengthen the Spleen Meridian
Strengthen the Spleen meridian by borrowing some energy from the previous meridian (i.e. Heart meridian).
The Procedure:
Gently hold the following two points (Spleen 2 and Heart 8) for 2 – 3 minutes. Use the tips of your fingers (ideally the index or the middle finger).
Do this one side of the body first, (e.g. your right side) and then repeat the same procedure on the other side of the body, also for 2 – 3 minutes.


Disclaimer: The images of acupressure points on this page are a part of an interactive acupuncture software/app called POINTS. You can find more information about the software in my review of this app. The images are licensed to Miridia Acupuncture Technology.
Step 2 – Stabilise the energy flow by holding the control points:
Gently hold the following two points (Spleen 1 and Liver 1) for about 1,5 minutes.
As in the previous step, do this on both sides of the body.

Try the Following!
Here are a few selected issues that you may like to work on by using the list below:
Stomach ache: Sedate The Stomach Meridian
Lower back pain: Sedate The Kidney Meridian
Respiratory problems, cough: Strengthen The Lung Meridian
PMS – hormonal imbalances: Three-Point Kidney, Liver and Spleen Meridians
Feeling depressed: Strengthen The Spleen Meridian
Having low immunity: Strengthen The Spleen Meridian
Feeling anxious, having a panic attack: Sedate The Triple Warmer Meridian
Acupressure Sedating, Strengthening, and Stabilising (Control) Points – Full List
Disclaimer: The images of acupressure points on this page are a part of an interactive acupuncture software/app called POINTS. You can find more information about the software in my review of this app. The images are licensed to Miridia Acupuncture Technology.
The Spleen Meridian
Sedating Points


The Spleen Meridian
Strengthening Points
The Spleen Meridian
Control Points (Stabilising Points)
The Heart Meridian
Sedating Points


Note: We never directly sedate the Heart meridian. Instead, we use the strengthening points of the neighbouring Small Intestine meridian.
The Heart Meridian
Strengthening Points


The Heart Meridian
Control Points (Stabilising Points) after strengthening


The Heart Meridian
Control Points (Stabilising Points) after sedating


The Small Intestine Meridian
Sedating Points


The Small Intestine Meridian
Strengthening Points
The Small Intestine Meridian
Control Points (Stabilising Points)
The Bladder Meridian
Sedating Points

The Bladder Meridian
Strengthening Points


The Bladder Meridian
Control Points (Stabilising Points)

The Kidney Meridian
Sedating Points

The Kidney Meridian
Strengthening Points

The Kidney Meridian
Control Points (Stabilising Points)


The Pericardium (or Circulation Sex) Meridian
Sedating Points

The Pericardium (or Circulation Sex) Meridian
Strengthening Points

The Pericardium (or Circulation Sex) Meridian
Control Points (Stabilising Points)

The Triple Warmer Meridian
Sedating Points

The Triple Warmer Meridian
Strengthening Points

The Triple Warmer Meridian
Control Points (Stabilising Points)

The Gallbladder Meridian
Sedating Points


The Gallbladder Meridian
Strengthening Points

The Gallbladder Meridian
Control Points (Stabilising Points)

The Liver Meridian
Sedating Points

The Liver Meridian
Strengthening Points

The Liver Meridian
Control Points (Stabilising Points)

The Lung Meridian
Sedating Points

The Lung Meridian
Strengthening Points

The Lung Meridian
Control Points (Stabilising Points)

The Large Intestine Meridian
Sedating Points

The Large Intestine Meridian
Strengthening Points

The Large Intestine Meridian
Control Points (Stabilising Points)

The Stomach Meridian
Sedating Points

The Stomach Meridian
Strengthening Points

The Stomach Meridian
Control Points (Stabilising Points)

Learn More About Meridians and Acupressure Points
I hope you enjoyed reading this page. If you’d like to learn more about acupressure points and how to use them, I highly recommend the interactive acupuncture software ‘POINTS’, which has been the source of the acupoint images on this page. You can read my review of this software here: POINTS Review – Acupuncture Points and Charts.

I also highly recommend the folding laminated chart pictured below. It shows every single acupressure point on our body, including the poetic ancient Chinese names for each important point. I’ve found this chart a very valuable study guide, especially during my Energy Medicine Foundation Course.


Share Your Thoughts
It would be nice to hear about your experience. Do you have experience with acupuncture or acupressure, and if so, with what results? Let me know your thoughts, questions, or other comments in the comments below and I look forward to getting back to you soon.
Other posts you may like:

BY LUCIE DUN
This site has been built with DIVI, by Elegant Themes.

RECOMMENDED:


in alliance with
Transformational education to awaken your full potential

Disclaimer: This page contains affiliate links. This means that if you decide to make a purchase through my links, I will earn a small commission at no extra cost to you. (The full Affiliate Disclosure can be read here.) If you’d like to learn more about affiliate marketing, e.g. how to earn extra income from blogging and promoting products you like and would recommend to others, which is what I do, check out Wealthy Affiliate, my favourite platform for online marketers. You can create a free account, which will enable you to make your own website in a few simple steps, and host it with them – free of charge – for as long as you like. You can test it right now by trying their free website builder SiteRubix. Thank you for visiting!


")