TIPS ON STRENGHTENING YOUR IMMUNE SYSTEM

TIPS ON STRENGHTENING YOUR IMMUNE SYSTEM

We’ve all learned in the past few years how important is to keep our immune system strong. Over the past few years, I have been exploring various ways of strengthening the body’s resilience, especially those that could be easily implemented into my daily routine.

I’m happy to say that I found several tools and practices that caused a remarkable improvement in my health. I used to get colds at least every three months, but since I’ve started implementing these techniques, my immunity has become much stronger. There was a period when I hadn’t had a single cold for more than four years in a row!

In this post, I will mention my three favourite tools for a strong immune system.

1) ENERGY MEDICINE TECHNIQUES

Do the Daily Energy Routine (or parts of it) daily – it only takes a few minutes.

The Daily Energy Routine is a set of simple but powerful exercises by the legendary healer Donna Eden, the founder of Eden Energy Medicine. She was born with the ability to see energies and as she learned to work with her energy systems, she managed to heal herself from a number of serious conditions including Multiple Sclerosis. She has taught thousands of people how to empower themselves by using their own energy to heal themselves and stay healthy.

I met Donna Eden and her husband, clinical psychologist David Feinstein in 2019. I highly admire their work. In 2023 I completed the Eden Energy Medicine Certification program and I’d love everyone to learn about these incredible self-healing tools. The Daily Energy Routine is one of them.

Each of the exercises in the Daily Energy Routine is designed to balance and strengthen specific energetic systems in your body, leading to greater resilience, the ability to fight illness, and feeling better in general.

Follow the steps in Donna Eden’s video and see how you feel after going through the exercises!

Below is an outline of the main points from this video. It is best to watch the video first and use these points as a reference afterwards.

THE DAILY ENERGY ROUTINE:

1. THE FOUR THUMPS:

i) Cheekbones – grounding

ii) Collarbone – vitality

iii) Thymus – immune system

iv) Ribcage under breasts – metabolizing

2. THE CROSSOVER SHOULDER PULL – gives you energy, clarity of mind, supports healing

3. THE CROSS CRAWL – harmonizes energy patterns, helps the brain to function better

4. THE WAYNE COOK POSTURE – helps to stabilise emotions and improves focus

5. THE CROWN PULL – supports the flow of the cerebrospinal fluid, brings fresh energy into your head, good against headaches

6. CONNECTING HEAVEN AND EARTH – sends healing energies through your body, sends out built-up toxins

7. THE ZIP UP – strengthens your energetic field, protects against negative energies

8. THE HOOK UP – connects the central and governing meridians (at the front and back of your body) which creates a strong force, sending spiraling energy around the body and positively affecting all your energy systems. This simple exercise can sometimes stop a seizure. (Energy Medicine by Donna Eden, pg 99)

Note: During each exercise breathe in through your nose and out through your mouth

MORE IMMUNITY BOOSTING TECHNIQUES

I also recommend trying some of the exercises that were shown by Donna Eden and David Feinstein during the Covid-19 pandemic. In the video, Donna and David present several powerful immunity-boosting tools that can be done anywhere. I remember following the exercises and feeling much better instantly. I use these techniques frequently, and tech them to my clients.

DONNA’S IMMUNITY BOOSTERS – PART 1

1. THUMP YOUR THYMUS – to boost your immunity

2. MASSAGE THE POINTS UNDER YOUR KNEES (the ‘Stomach 36’ acupressure points) to stimulate nurturing energy and strengthen your immunity

3. MASSAGE YOUR NEUROLYMPHATIC REFLEX POINTS to help the lymph flow and remove toxins. These points can be found at multiple locations:

at the seams of your arms (to move toxins out of the body)

all around your chest (to move congestion out of your lungs)

on the sternum (to help overcome illnesses and give you vitality)

under your breast (for the stomach and liver reflex points)

under the ribcage (massaging your spleen reflex points is particularly beneficial for your immune system)

under the ribcage (all along) – the small intestine reflex points are also very important for your immunity

an inch above the belly button, and an inch to each side (adrenal reflex points, great against stress and too much adrenalin)

the sides of your thigh (outside: Large intestine reflex points / Inside: Small intestine reflex points)

go down the side of your spine and massage all the neurolymphatic points (‘The Spinal Flush’). This is extremely cleansing and rejuvenating.

4. THE HOOK UP – connects front and back meridians which strengthens your aura and protects you against negative energies.

5. HOLD SPLEEN MERIDIAN ACUPRESSURE POINTS (follow Donna’s instructions in the video)

First pair: 2-3 minutes (do this twice – first  on one side of your body, then on the other)

Second pair: 1 – 2 minutes (again, hold the points on both sides of the body – with this pair, it’s is easy to hold both sides in one go)

Holding these points strengthens your immune system and can also generate more inner joy.

6. HOLD / MASSAGE THE ‘LOWER DANTIAN’ CALMING POINTS:

Drop two inches below your belly button and press all your fingers into the area. There is an energy center called the Lower Dantian, and holding it calms fear and panic.

Here is a follow-up on the immunity-boosting video above, with additional tips and exercises.

DONNA’S IMMUNITY BOOSTERS – PART 2

1. MASSAGE THE TRIPLE WARMER POINT (see instructions at 0:45) to mobilise the protective force of this meridian in the optimal way

2. MASSAGE NEUROLYMPATICREFLEX  POINTS (Kidney 27 – under your collarbone corners – see 1:52) – to help kidneys function well, help all the other meridians flow in the right direction

3. ‘RAKE’ YOUR NEUROLYMPHATIC REFLEX POINTS around the lung area to help them work well

4. DO STRETCHING EXERCISES e.g. the Ileocecal and Houston valves (3:10) – to help valves in your body open and keep poisons moving out of your body

5. BREATHE DEEP (especially on the out-breah)

6. STRETCH YOUR MOUTH WITH STAINLESS STEEL SPOON – to activate important meridians (4:19)

7. KEEP TAKING VITAMIN C to keep your immune system strong.

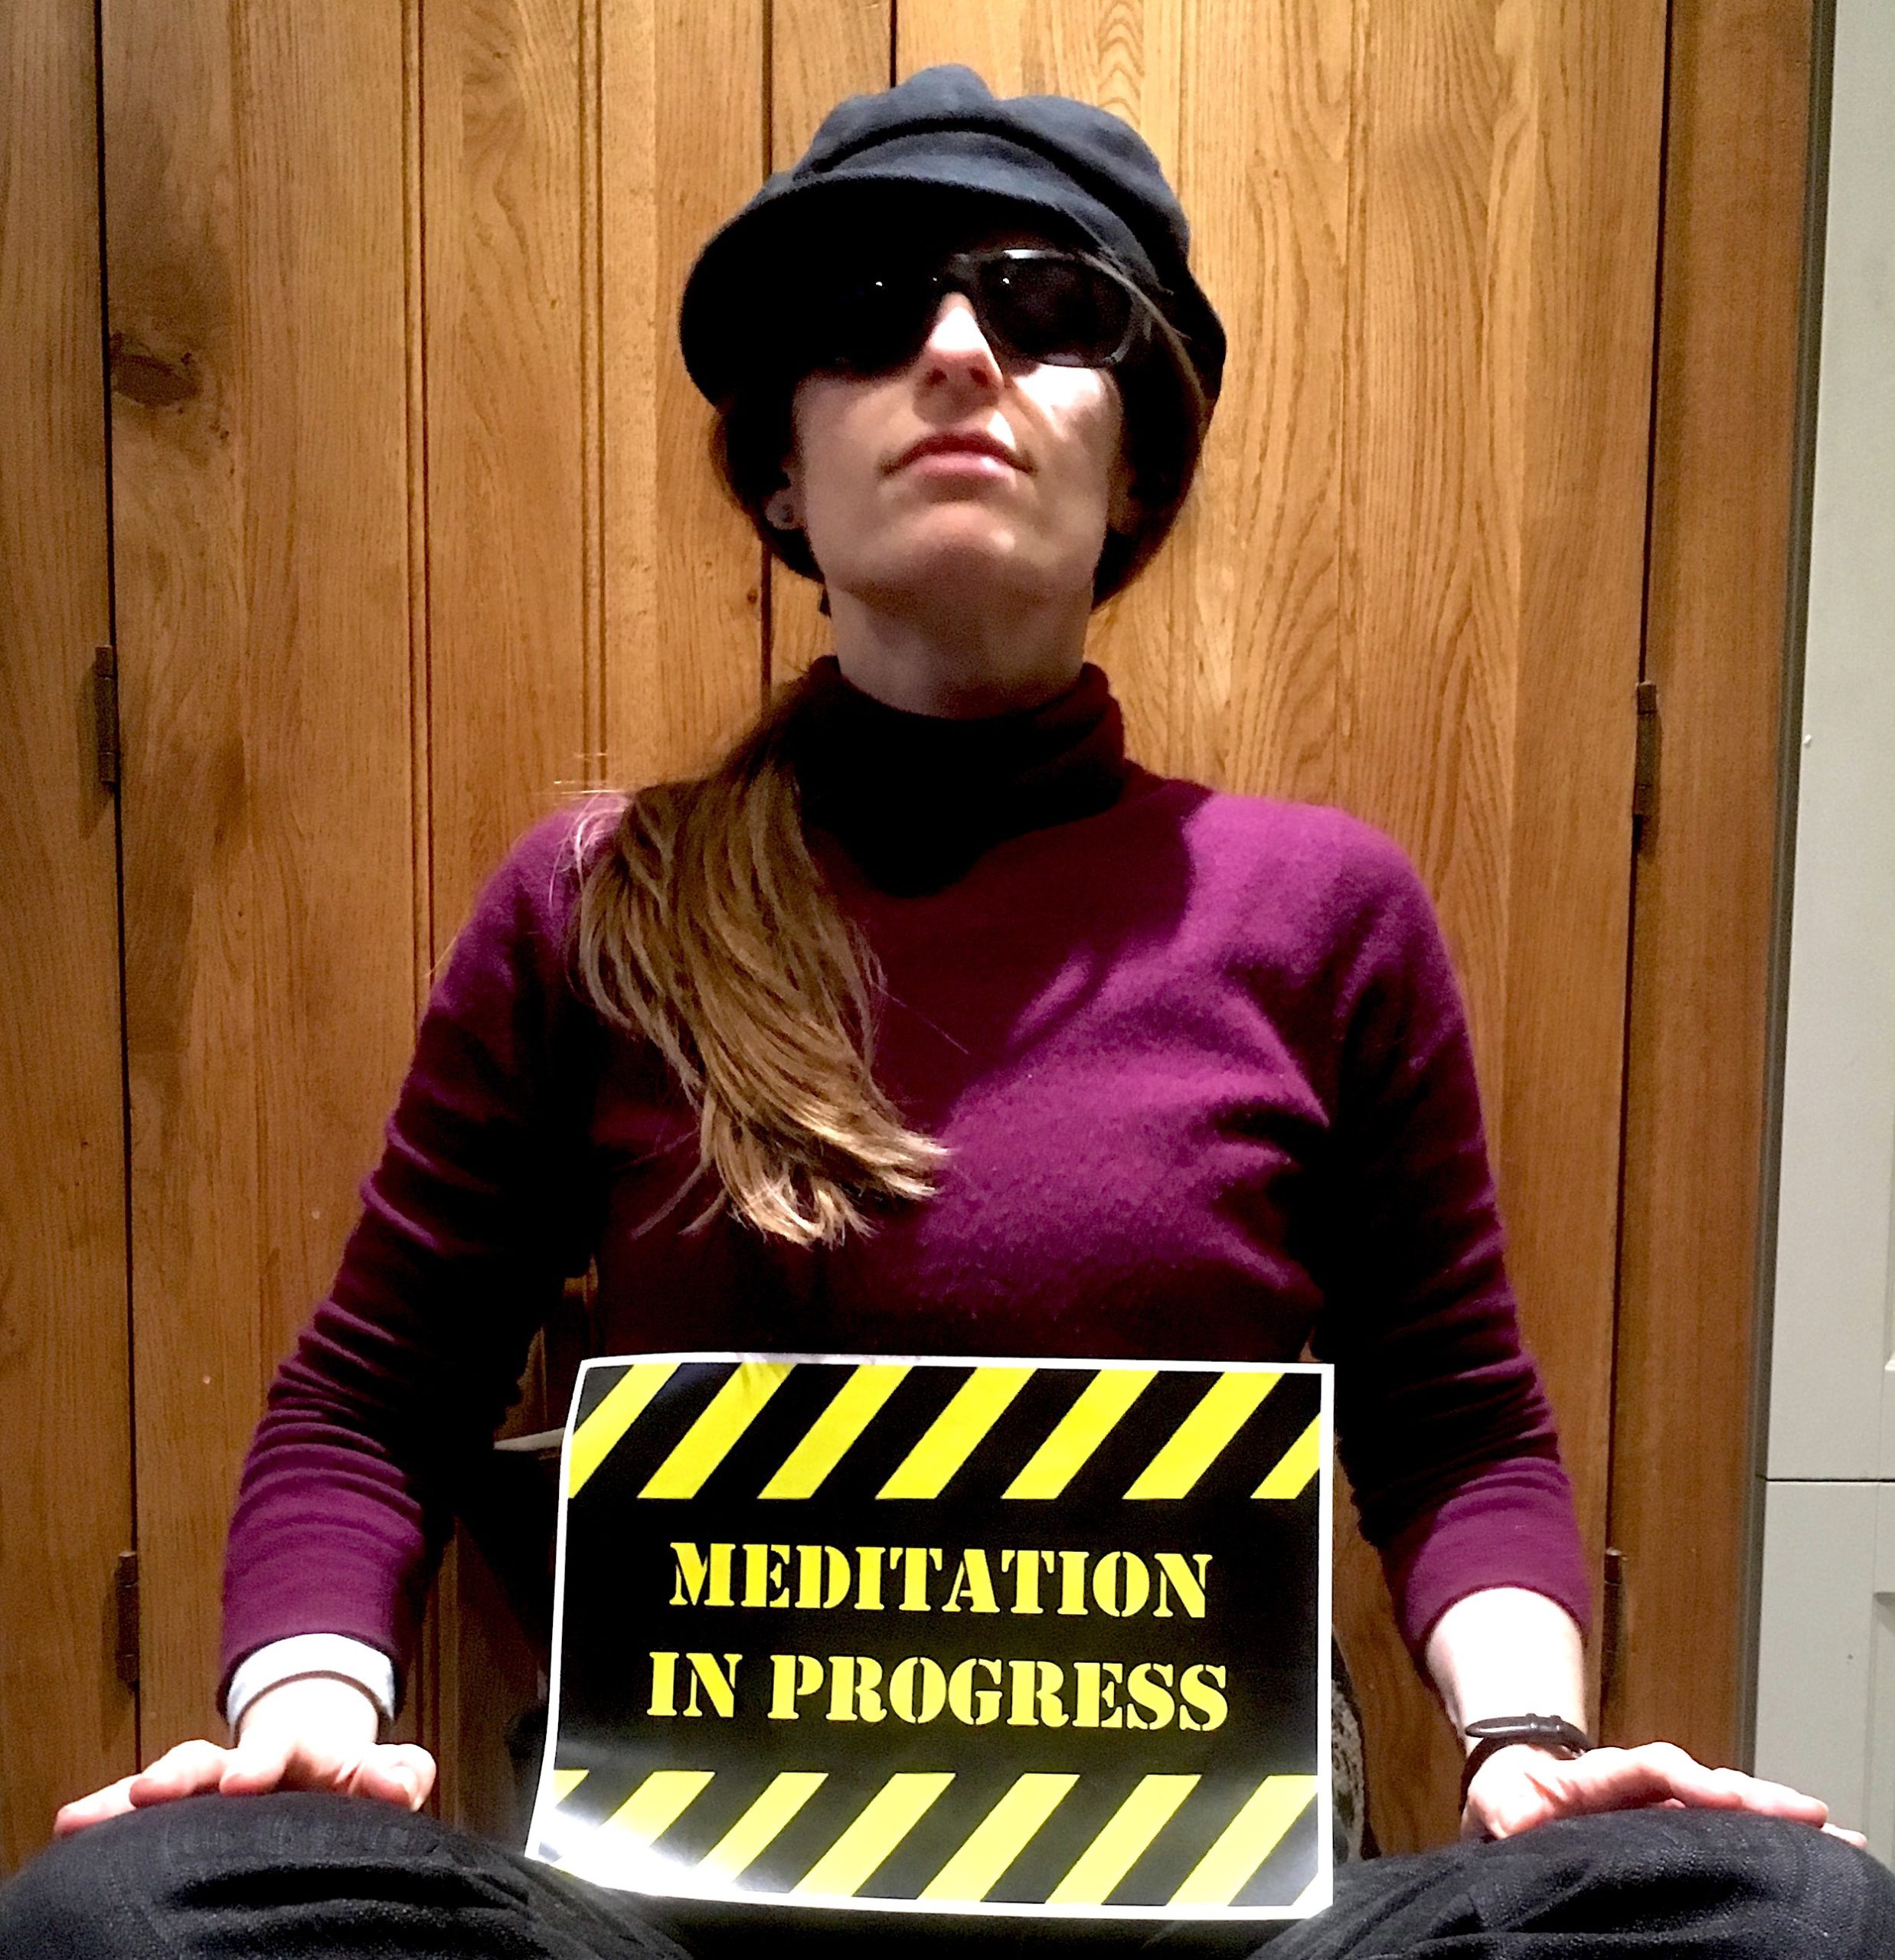
2) MEDITATION

Try meditation. I can’t recommend it enough. I was introduced to meditation (perhaps rather surprisingly) by ‘The God of Hell Fire’ Arthur Brown (a 60’s icon singer I used to play keyboards with).

If you’ve ever seen him on stage and wondered where he gets all that crazy energy, I can tell you – after my own experience – that this might well have something to do with it. Meditation is proven to give you more energy, strengthen your immunity, decrease your stress levels, improve your sleep, making you more creative, and much more.

See my article about the numerous benefits of meditation, where I share my own experience with regular meditation practice. If you are a busy person, it is exactly the right thing for you, because it will actually create more time in your day. You’ll find out for yourself as soon as you start practicing it regularly. Together with Donna Eden’s Daily Energy Routine, it’s one of the best things you could be doing for your immune system.
3) HYDROGEN WATER

Drink good quality (filtered or bottled) water infused with hydrogen. This smallest and lightest molecule in the whole cosmos has enormous potential and can power up your cells and provide numerous benefits to the body, from anti-inflammatory and antioxidant effects, to anti-allergic and anti-aging.

Molecular hydrogen influences metabolic pathways and upregulates the body’s own antioxidants, selectively targeting harmful radicals, thus protecting cells from damage and reducing oxidative stress, which is linked to aging and various diseases. It plays a key role in supporting the immune system.

For me, this has been one of the greatest discoveries ever. I drink hydrogen water daily and feel uplifted, energised and balanced.

Another positive consequence of drinking molecular hydrogen is that I stopped craving late-night snacks, which used to be my long-term bad habit.

You can find all the relevant information about molecular hydrogen on my Home page.

Molecular hydrogen

BY LUCIE DUN

This site has been built with DIVI, by Elegant Themes.

Naturegrooves Logo 19

 in alliance with

the shift network logo

Transformational education to awaken your full potential

The Shift Network

&

Certification of The CellPoer bottle

Disclaimer: Some pages on this website contain affiliate links. This means that if you decide to make a purchase through my links, I will earn a small commission at no extra cost to you. If you’d like to learn more about affiliate marketing, e.g. how to earn extra income from blogging and promoting products you like and would recommend to others, which is what I do, check out Wealthy Affiliate, my favourite platform for online marketers. You can create a free account, which will enable you to make your own website in a few simple steps, and host it with them – free of charge – for as long as you like. You can test it right now by trying their free website builder SiteRubix. Thank you for visiting!

Free starter membership with Wealthy Affiliate

How to Relieve Stress and Anxiety

How to Relieve Stress and Anxiety

Zen-Inspired Stone Moon Tealight Holders

If you’d like to learn how to relieve stress and anxiety through a few simple but effective techniques, then you are in the right place. The renowned practitioner of energetic healing, Donna Eden,  shows several  techniques that can calm your emotions in less than a minute. Plus, if you practice these techniqes often, you will contribute to building your long-term emotional resilience.

The Constant Flow of Energy and Emotions

The saying ‘Nothing ever stays the same’ applies to everything, and our emotions are no exception. Since our energy is in a constant flow, emotions are bound to fluctuate as well. Everyone deals with this differently – some people have more natural resilience, while others may become extremely vulnerable. To be able to master emotional control is one of the most valuable skills to have, and the good news is that we can use our own energies to gain more control over our states.

water_in_movement

Stress and its Effects

One of the most common causes of feeling bad is stress. It has an ability to impact every single system in your body, and its effects can either be immediate and visible, or gradual and not too obvious in the first stages. It often accumulates over time, and then finally hits us in a form of a physical illness or depression.

Many of us go through our day in the state of emergency response without even realizing it, but the stress keeps building up in our body whether we’re aware of it or now, and it will take its toll on our health eventually.

What Happens in Our Bodies During Stress

When our thoughts about everyday problems take over us, we don’t see what is happening in our body: Up to 80% of the blood leaves our forebrain to provide strength to our muscles to deal with the potential danger, and our bloodstream gets filled with stress chemicals. In that state, our biochemistry is not very different from the one of a Cro-Magnon man facing a wild beast. The advanced cognitive abilities that we have developed become dimmed. As the reactive primitive parts of the brain take over, our ability to respond accordingly to our current evolutional stage is considerably inhibited.

art therapy colours

Inner Emergency Triggers

One of the clearest illustrations of this concept is post-traumatic stress disorder; People afflicted with this condition can display extreme, exaggerated reactions to seemingly harmless stimuli. For instance, overhearing someone saying something, seeing something on TV or encountering a certain scent can trigger a traumatic memory. This makes their body think they are facing a mortal threat, and they react accordingly.

But similar, if a less dramatic scenario applies to most of us when we get stressed, anxious or angry. Our body sets in motion all the biochemical emergency procedures which are not really required. However, our body doesn’t distinguish between the real-life threat and something far less endangering, and all these stress processes can have a negative impact on your health.

Rewiring Your Nervous System

The good news is that we can gradually reprogram our autonomic nervous system, so it no longer triggers those extreme stress responses, deeply ingrained in us biologically millions of years ago. By teaching our nervous systems these new tricks, we can keep and even strengthen our health.

This reprogramming can be achieved by teaching our nervous system to keep the blood in the forebrain, which will result in a better ability to think clearly even in the midst of a seeming crisis. And when our brain gets used to these new ways of processing usually stressful impulses, we’ll no longer react impetuously, but we’ll rather respond to the situation by a much more down-to-earth way.

The First Aid Kit for Your Nerves: Holding the Neurovascular Points

All this can be achieved by an incredibly simple energy exercise – holding the neurovascular points on your head while thinking of a stressful situation / disturbing memory, which will cause primitive brain centres to respond in a calm way, rather than as in an emergency. The more you do this exercise, the more you’ll notice that manage that the stress-response cycle is not activated when a certain situation or a memory occurs.

This works because your stress reactions are based more on physical responses rather than psychological. When we hold the neurovascular points, blood flows from the reactive brain up into the prefrontal cortex, where we can solve the issue with more clarity and decrease the emotional reactivity. So rather than blindly react, we’ll be able to respond to an otherwise stressful issue with healthy detachment.

Try in Now

Put your one hand over your forehead and the other one over the back of your head. Take several deep breaths, close your eyes and feel the calm pulse in your hand or on your forehead.

Neurovascular Points

You can also try a variation of this exercise by placing the pads of your fingers on your forehead, covering the two slight indents on your forehead, while your thumbs rest on your temples.

Stay like this for a while, ideally for a few minutes – according to the level of your stress. Doing this will help the blood return your forebrain, and you will realise that you are thinking more clearly and that the painful or disturbing emotion has subsided.

Gaining Long-term Emotional Stability

The more frequently you repeat this exercise, the quicker will your brain understand that it is not necessary to activate the stress-response cycle when that specific thought/memory occurs.

It is comparable to resetting a device to its original factory settings. Your mind will become free of disturbing information written by your life experience. I’d recommend trying this exercise with a number of different stressful memories, thoughts or pressing issues. The brain’s unwanted response to any of these categories will gradually ease out. You’ll soon notice you have acquired much more emotional stability when you experience a stress-triggering situation or a disturbing thought.

Three Techniques with Donna Eden

The renowned teacher of energy medicine,  Donna Eden, and her husband, clinical psychologist David Feinstein, show how we can work with our own energies to release stress and anxiety. Holding the Neurovascular Points is one of those techniques (Donna talks about it from 1:23 onwards.)

David and Donna are also the authors of the book ‘The Healing Power of EFT & Energy Psychology’, where they present a large number of techniques for emotional healing. In his clinical practice, David Feinstein uses Donna Eden’s energy medicine techniques as well as EFT, which stands for ‘Emotional Freedom Techniques’, and consists of tapping on specific meridian points. This technique has been used with tremedous success for all kinds for phobias and traumas. War veterans, for instance, have been succesfully treated using EFT tapping.

The ‘Kettle-Trick’: Energy-Test Yourself

It is very interesting to try the following experiment, based on the method used in energy psychology and kinesiology:

Fill a jug or a tea kettle with water, and try to lift it with your arm straight in front of you. You should be able to raise the kettle in front of your eyes. It should be moderately heavy, to make your muscles work. If it’s too heavy (if you can’t lift it in front of your eyes), pour some water out until it reaches an optimal weight.

a kettle for energy-testing experiment

Now think about something that makes you feel nice. It could be pleasant memory, or something you’re proud of or grateful for.

Lift the kettle in front of your eyes again. It should be relatively easy.

Now think of something that bother you, stresses you or makes you anxious. Try to lift the kettle again. You’ll notice that your arm gets considerably weaker after the negative thought. This shows the instant effect stress can have on your energy flows. Your energy is not feeding your muscles at its full power while you are stressed (or, as in this case, tricking your brain by pretending to be stressed).

You can use this experiment is more useful way than a fun parlour trick. If you know of anything in your life that stresses you or triggers negative or anxious thoughts, do this experiment to confirm it.

Then follow Donna Eden’s techniques, especially the Neurovascular hold by placing your palm on your forehead for one to three minutes while thinking of the pressing issue.

Don’t worry about ‘negative thinking’; this is a method that uses the truth that you feel inside, rather than fooling yourself with positive affirmations. And while acknowledging the uncomfortable or painful truth, you are sending a physical message to your brain, which reads something like ‘Even though I’m thinking about all this bad stuff, there’s no need to go into a fight or flight mode.’

When you have finished, try to lift the kettle again while thinking about the same unpleasant issue.

You’ll hopefully get a nice surprise by being able to stay strong – which indicates that despite a usually stress-triggering image in your mind, your energy remains balanced and you are now responding to stress much more calmly, rather than reacting through the instinctive emergency response. The more you do these exercises, the more your naturally adaptable brain will ‘cooperate’.

Energy-testing with a Friend

Instead of using a kettle, you can get a friend to energy-test you by pushing your arm down (raised sideways, up to the level of your shoulder) while you offer resistance.

Rewiring Your Brain

The amazing characteristic of our brain, neuroplasticity, can cause radical rewiring of your brain’s old reactive patterns, allowing us to start experiencing more peaceful and joyful states of mind, and become much more emotionally resilient.

mechanical_brain

Gaining Long-term Emotional Stability

The more frequently you repeat the exercises presented in this article, the quicker will your brain understand that it is not necessary to activate the stress-response cycle when that specific thought/memory occurs.

It is comparable to resetting a device to its original factory settings. Your mind will become free of disturbing information written by your life experience. I’d recommend trying this exercise with a number of different stressful memories, thoughts or pressing issues. The brain’s unwanted response to any of these categories will gradually ease out. You’ll soon notice you have acquired much more emotional stability when you experience a stress-triggering situation or a disturbing thought.

Share Your Thoughts

If you would like to ask about anything in this article, or would like to express your opinion about this field, leave a comment below. I’d also be very interested to learn about your any other techniques for relieving stress, so feel free to share your knowledge or experience.

BY LUCIE DUN

This site has been built with DIVI, by Elegant Themes.

RECOMMENDED SECTIONS:

Online courses and webinars
Health and Wellbeing Products
Inspirational Books and Audio

Disclaimer: This page contains affiliate links. This means that if you decide to make a purchase through my links, I will earn a small commission at no extra cost to you. (The full Affiliate Disclosure can be read here.) If you’d like to learn more about affiliate marketing, e.g. how to earn extra income from blogging and promoting products you like and would recommend to others, which is what I do, check out Wealthy Affiliate, my favourite platform for online marketers. You can create a free account, which will enable you to make your own website in a few simple steps, and host it with them – free of charge – for as long as you like. You can test it right now by trying their free website builder SiteRubix. Thank you for visiting!

Free starter membership with Wealthy Affiliate

   Let’s keep in touch:

Naturegrooves Logo 19

 in alliance with

Buddhagroove-Logo_website
buddhagroove

Learn to Juggle for Your Brain Health

Learn to Juggle for Your Brain Health

I perceive myself as a fairly inquisitive person. I like reading and learning new things, but my big problem has always been concentration and long-term focus. Often, reading one book would take me weeks, sometimes months, and I wouldn’t usually remember much afterwards. I wanted to change this.

The Most Brain-Specific Exercise

A few years back I saw a video of a doctor who called juggling ‘the most brain-specific exercise, and who got all his medical students to juggle. According to the students, juggling helped them gain better concentration and relieve stress at the same time.

Affiliate Disclosure: As an Amazon Associate I earn from qualifying purchases. If you make a purchase through my links, I will earn a small commission at no extra cost to you. The full disclosure can be accessed here.

I’ve never been interested in juggling, considering it only as a party trick or a circus-specific sport, but this video stirred my curiosity. If juggling could improve concentration, I thought to myself, it might help me to improve my reading and learning skills in general.

Studies on Effects of Learning a Visual-Motor Skill

An interesting quote from an article called “Changes in Gray Matter Induced by Learning” states:

Recently, activation-dependant structural brain plasticity in humans has been demonstrated in adults after three months of training a visuomotor skill. Learning three-ball cascade juggling was associated with a transient and highly selective increase in brain gray matter in the occipito-temporal cortex comprising the motion sensitive area hMT/V5 bilaterally.

An Oxford study claims that learning a new skill such as juggling creates more white matter in the brain. White matter are the nerve strands that help different parts of the brain communicate with each other, and an activity such as juggling can boost the connection between different parts of the brain.

Thanks to all these studies, programmes are now being put in place for people with brain injuries (such as stroke victims) to be taught to juggle in an attempt to increase their brain functioning.

Benefits of Learning to Juggle

Juggling encourages the brain to work in a crossover pattern, which can be beneficial for children and adults with dyslexia, as well as anyone who would like to improve their reading skills.

Complex learning tasks, juggling included, provide multiple benefits, such as:

– Relieving stress

– Sharpening focus and concentration

– Increasing dexterity and coordination

– Diminishing food cravings

– Assisting in the cessation of smoking

– Prevention or delay of Alzheimer’s disease

Jim Kwik

One of the people talking highly of juggling is a renowned ‘brain coach’ Jim Kwik,  a world expert in speed-reading, memory improvement, brain performance, and accelerated learning. For over 25 years, Jim has worked with students, seniors, educators, athletes, as well as many of the world’s leading CEOs and celebrities such as Will Smith.

Will Smith and Jim Kwik

Jim considers juggling one of the most important exercises for the brain. He says that movement such as juggling helps our brain build new connections and thus it’s one of the best tools for improving our learning skills. In his own words, ‘As your body moves, your brain grooves’.

I’m a great fan of Jim Kwik. He is one of a few whose fame hasn’t gone to their heads. I love his warmth and humility. It was he who really inspired me to learn to juggle, which has considerably improved my reading skills, focus and memory. I’m immensely grateful to him.

I find his personal story very moving – as a child he suffered from a serious brain injury, after which he found it extremely challenging to learn anything, especially reading. One of his teachers even called him ‘the boy with a broken brain’.

However, Jim perceived it as a life challenge in the best possible sense and created strategies to dramatically enhance his mental performance, which got him to where he is today – helping others to maximize their performance, unleash their potential and find true meaning in life. He is also the author of the 2019 bestseller ‘Limitless’.

Jim says that we’re not practicing juggling just for the sake of it. He views learning to juggle as a metaphor for embracing challenges in our life. When you’re learning to juggle you are forced to develop certain discipline, which will benefit all areas of your life.

As Jim says: “If you’re able to create one new habit, what else will you be able to do? Possibilities will open up because you’ll be in the habit of creating empowering habits.”

The Treasure You Seek…

Here are a few great quotes that Jim often uses. I particularly like the last one which is rather subtle, but so true! That thought-provoking sentence was a revelation to me – I recognized myself in it at once, and the realisation has completely revolutionized my workflow.

– If an egg is broken by an outside force, life ends. If broken by an inside force, life begins. Great things always begin from the inside.

– First you create your habits and then your habits create you.

– Whether you think you can, or you think you can’t – you’re right. (Henry Ford)

– How you do anything is how you do everything.

–  The difference between a normal person and a champion is that a champion is willing to push past the pain period.

– The treasure you seek is found in the task you’re avoiding! 

My Own Juggling Adventure

After having read all the good things about juggling and its effects on one’s brain, I decided to learn to juggle.

I’ve documented a part of my learning journey here. Get ready for my juggling feats but do not necessarily follow everything I do there…!

The tutorial I’m mentioning in my video is, to my mind, one of the clearest, most beginner-friendly juggling tutorial I’ve ever come across. The guy who teaches it, ‘Coach Bob’, is a real juggling pro (do check his and his wife’s website full of their crazy juggling acrobatics).

His instructions are super-comprehensive, step-by-step, not like the usual three-step instructions that come with the box of juggling balls, or some other Youtube tutorials which don’t always seem to empathise with a real beginner’s mind.

Coach Bob breaks his tutorial into eight steps, and each step must be learned properly before moving on to the next one.

I’m happy to say that thanks to Coach Bob’s video I finally learned the three-ball cascade. As you can see in my video above, I’ve reached my goal of juggling for one minute.

Below is Coach Bob’s training step-by-step. If you follow this tutorial and practice a little bit every day, then you should be able to juggle in less than two weeks’ time, if not earlier!

Go Slower, Arrive Sooner

‘If you can tie your own shoes you can learn how to juggle’.

This is how Coach Bob introduces his tutorial.

He is adamant that YOU can learn to juggle as well, because he taught a wide range of people to juggle: Between the ages of six and eighty!

The coach Bob method is an 8-step process.

I’d recommend to watch the video and follow the points written here step-by-step. You don’t have to read all the notes – rather use them as a reference.

It is really important to remember this:

If you go slower, you’ll arrive sooner. Take the time to master each step before going to the next one.

Juggling Balls

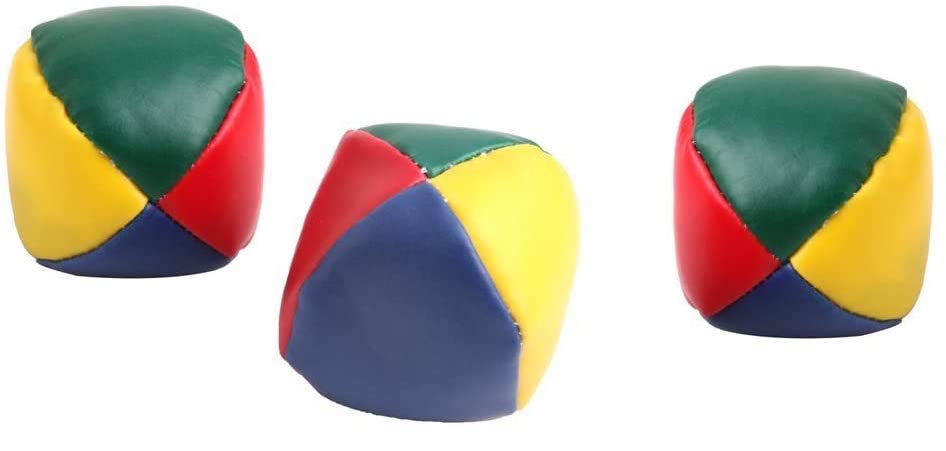
Before you start learning, make sure you have suitable juggling balls that don’t bounce all around, because it would drive you crazy. Don’t use tennis balls or anything that bounces. The best type is a so-called ‘beanbag’, and you can get a set of three for almost nothing on Amazon. (And if you cannot wait before they arrive, you can always resort to rolled-up socks! 🙂


Learn to Juggle Three Balls – a Tutorial for Beginners by Coach Bob


Step 1 – Basic Throw with One Ball

(1:10 at Coach Bob’s video)

The first step in learning to juggle three balls is a one ball drill. This gets you used to the basic throw you’ll use in three ball juggling.

Bend your arms in the juggling position.

You need to imagine a rectangular box in front of you.

The box has its lower corners in line with your bent elbows, and the upper corners are a bit above your head.

Start with your hands pointed slightly inwards (which will form the lower two corners of the box) and then throw the ball towards to opposite top corner of the imaginary box. This should be slightly higher than you head is.

The technique of the throw is also important: Don’t throw it fast in a jerky way – the throw should be more of a scooping motion.

When the ball reaches the opposite top corner, then you just let the ball fall straight down to that bottom corner, and catch.

Then repeat the process with your opposite hand (which is usually the weaker hand, so this is going to need some extra practice), and again, throw the ball up towards the opposite corner, let it fall, and catch it.

The sound of this basic pattern is:

1) Throw

2) Catch

Do this until it becomes comfortable. Keep your chin up to help you get the necessary height – the ball should peak above your head.

Also, make sure the throws are consistent, i.e. that the ball always reaches the same height in those imaginary top corners.

Now go ahead and practice the Step 1 until it becomes really comfortable and you are reaching the same height.

Step 2 – Adding a snap of the fingers (Throw – Snap – Catch)

(2:41 at Coach Bob’s video)

We’re going to continue with one ball, and we’re going to add a snap of the fingers before you catch the ball.

You’re going to throw with your right hand (or whatever hand you start with), and when that ball hits the peak, that’s when you snap your fingers before catching it.

The sound of the technique is:

1) Throw

2) Snap + Catch

Do the snap just as the ball peeks, (or maybe a little bit after).

If for some reason you can’t snap your fingers, you can replace the snap with a slap of your thigh.

If you’re throwing too low, you may not have time to get that snap (or slap). The higher the throw is, the more time you have to snap (or throw another ball as we’ll see in Step Three).

Step 3 – Throw – Throw – Drop – Drop

(3:50 at Coach Bob’s video)

For step three Bob recommends to find a table, or a bed, or anything that will keep you from having to constantly bend over and pick up the juggling balls when you drop them – because now we’re going to start dropping quite a bit!

In step three we’ll be using two balls. Start with the more confident hand, and throw one of the balls up to the opposite corner of the imaginary box.

When that ball hits the corner, instead of snapping (which we did in Step 2) you’re going to throw the other ball to the opposite corner.

And because you hopefully have something like a table or a bed in from of you, you shouldn’t worry about catching the balls. Instead, you should keep your full focus on the throws.

When the ball peaks, throw in the second ball.

The sound of this pattern is:

 1) Throw

2) Throw

3) Drop

4) Drop

You should hear FOUR distinct beats:

“One – two – three four, one – two – three – four”.

Also, notice where the balls are landing, because that will tell you whether you are on the right path.

If you have a table in from of you, notice where on the table the balls are landing – they should land right in front of you.

Or, if you weren’t using a table, they should by your feet, but not much further.

Spend a lot of time practicing this until you become really confident with this technique. It will make learning the next steps much easier.

Also, teach both your hands, right and left, to become confident with that first throw.

For example, if you do:

1) Right

2) Left

3) Drop

4) Drop

Then also practice:

1) Left

2) Right

3) Drop

4) Drop

Don’t go on to the next step until the technique in Step feels very comfortable. It’s worth waiting for a few days, focusing just on this technique. Your patience will pay off – you’ll see for yourself soon.

Step 4 – Throw – Throw – Catch – Catch

(5:27 at Coach Bob’s video)

Step four is this most difficult step in the eight step process, and this is where most people quit learning to juggle – but not you! YOU CAN DO IT. Now I have to admit something here: I tried to learn to juggle a year ago, but, shamefully, after about a week of trying and not getting it right at all, I quit. It was too frustrating and I didn’t like to see myself like a loser, so it was easier to just forget it.

The one excuse I have is that I didn’t find a tutorial video which would suit my pace and my way of learning. I’m pretty sure that if I found Coach Bob’s video back then, that I wouldn’t quit.

So hopefully this tutorial (together with his demonstration in the video), will save you plenty of time of searching for a comprehensive, thorough tutorial, and also save you from that frustrating feeling of being stuck on your learning way and doubting yourself.

Now, let’s get on with Step 4:

We’re going to start with two balls again, like in the previous step. But instead doing:

1) Throw

2) Throw

3) Drop

4) Drop,

we’re going to do:

1) Throw

2) Throw

3) Catch

4) Catch

While doing this, keep those catching hands quite low down – don’t be tempted to catch them too high up in th3e air. We need the throws to be quite slow, and we achieve this by creating some distance between the ball and the catching hand.

Also, watch for consistent height on the throws.

This is going to be difficult at first, but stick with it. This is a crucial step to learn before going on to the next step. As Coach Bob says, using a witty quote, ‘Everything is difficult until it becomes easy.’

Once again, there should be four distinct

beats: “One – two – three four, one – two – three – four…”

when you are doing the “Throw – Throw – Catch – Catch”.

Remember to change the starting hand, so both your left and right hand are confident at doing the starting throw. Basically, both your hands should be equally trained to do the starting throw, in order to hit the same height of the opposite corners in that imaginary box.

So, practice this pattern:

1) Right

2) Left

3) Catch

4) Catch

And then:

1) Left

2) Right

3) Catch

4) Catch

At this point you shouldn’t do a continuous juggle, (a loop) although it may be tempting; a lot of people will try to keep two balls in the air in a frantic loop, but at this point, we are just practicing in order to give our future juggling precision and good rhythm, so these throws should not yet be continuous.

Instead, it should be just one part:

1) Throw

2) Throw

3) Catch

4) Catch

Then stop, take a deep breath, and only after a pause do another repetition of this pattern. (And remember to give both hands a chance at the starting throw)

Also, don’t worry about speed, just get that four distinct beats down and you should start improving. If you find it too difficult, go back to Step Three, and work on the “Throw – Throw – Drop – Drop” pattern.

Don’t forget to keep a consistent height of those throws.

What might help you is to keep your chin slightly lifted, so you can throw the balls a bit higher and still be in control.

All this we’ve been doing in this step is going to take a lot of practice – don’t rush through this step. It will really pay off if you are patient and stick with the practice. Coach Bob closes this part of the tutorial with another highly relevant quote – ‘Go slower, arrive sooner’!

Step 5 – Throw – Throw – Snap – Catch

(7:08 at Coach Bob’s video)

For step 5 we’re going to stick with using two balls and doing the “Throw – Throw – Catch – Catch” pattern, but we’re also going to add a snap of the fingers.

The snap will be done by the hand that has thrown the first ball. And it will be done in the moment when the second ball is falling from the top corner, just about to land in that snapping hand.

The sound of the pattern will be:

1) Throw

2) Throw

3) Catch

4) Snap + Catch

The hand that throws the first ball will be the one doing that snap just before catching the second ball, so it will sound like this:

1) Right

2) Left

3) Catch

4) Snap (with right hand) + Catch (with right hand)

Or, if we start with the left hand, the pattern will sound:

1) Left

2) Right

3) Catch

4) Snap (with left hand) + Catch (with left hand)

To describe the steps with even more detail, so you can fully visualise these patterns in slow motion and then try it for real. It’s really useful to rehearse these movements in your imagination, because the brain registers it anyway, and, rewarding you for the mental work, it will make the real life situation easier for you later on.

Let’s imagine we are starting with our right hand:

1) Right hand throws the first ball

2) Left hand throws the second ball

3) Left hand catches the first ball

4) Right hand snaps, and then catches the second ball.

And vice versa, if you want:

1) Left hand throws the first ball

2 Right hand throws the second ball

3) Right hand catches the first ball

4) Left hand snaps, and then catches the second ball.

If you can’t snap, you can slap the side of your thigh instead, or whatever feels comfortable, and which you can do with ease just before catching that ball.

You may be wondering why bother with that snap at all?

It’s because eventually that snap is going to be another throw when you are using three balls.

So before we attempt the three-ball juggling, you should get used to doing something with that space between the two catches (because soon there’s going to be a throw between them, instead of the snap).

All the exercises we have done so far are very important.

Here is a recap of the patterns we’ve learnt so far to practice:

1) With one ball:

1) Throw

2) Catch

2) With one ball:

1) Throw

2) Snap + Catch

3) With two balls:

1) Throw

2) Throw

3) Catch

4) Catch


4) With two balls:

1) Throw

2) Throw

3) Drop

4) Drop


5) With two balls:

1) Throw

2) Throw

3) Catch

4) Snap + Catch


You should be able to do about 10 to 20 of these in a row without dropping, starting with either hand, before you go on to the next step.

Aim for consistent heights and consistent throws, and try to stay relaxed when you’re doing this. Relaxed focus is the best state for successful juggling!

Step 6 – Throw – Throw – Catch – Catch (with three balls)

(8:30 at Coach Bob’s video)

Now we finally get to start working with 3 balls!

We’ll start with having two balls in one hand, and one in the other hand. The first throw will be done with the hand that has two balls in it.

It can be either right or left hand, whichever feels more natural for you. But for this example, let’s say you’ve opted for the right hand as the starting one.

Put two balls in your right hand; one ball will sit in your palm (and will stay there without moving during the whole Step 6 practice.)

Then you make a ‘peace sign’ with your index and third finger, and extend your thumb as well, and grab another ball with these three fingers. 

You always start juggling with the hand that has more balls in it.

For this practice, we will start with the right hand. (Although you can start with any hand.)

Now, keeping the first ball in the palm of your right hand without throwing it, we’ll do the pattern from Step 4:

1) Throw

2) Throw

3) Catch

4) Catch

Once again, remember that at this stage you should be juggling with two balls only, keeping the third ball passively sitting in your palm.

You only have three fingers available (thumb, index and middle finger) to throw the other ball, while the first one is resting in the palm of the same hand. 

You’ll need to get used to throwing the ball using those three fingers only, and at the same time keep the other ball in the palm of your hand. It may feel a bit clumsy at first. 

And as you do the “Throw – Throw – Catch – Catch” pattern, you’ll be using those three fingers for throws as well as catches, while always holding that third ball in your palm without throwing it.

This way you will gain enough practice in order to move on to the next steps.

Let’s go through the process again, starting with the right hand:

1) Throw

2) Throw

3) Catch

4) Catch


That is:

1) Right

2) Left

3) Catch

4) Catch


Or, described with even more detail:

1) Right hand holds two balls, and throws the one further from the body, using three fingers only.

2) Left hand throws

3) Left hand catches the ball thrown by the ‘three fingers only’ from the right hand

4) Right hand, which has been clutching the third stationary ball, catches the ball thrown by the left hand.

Try to visualise this in slow motion, you’ll be training your brain, creating new neural connections, (brain loves novelty and learning!) and it will later reward you for this by making the whole learning process easier.

Repeat the “Right – Left – Catch – Catch” process several times.

But don’t try to attempt any loops yet, always pause after each set:

“Right – Left – Catch – Catch – STOP,

Right – Left – Catch – Catch – STOP” Etc.

Once this pattern becomes easy, you’re going to put the set of the two balls in your left hand, and start working on the opposite side:

1) Left

2) Right

3) Catch

4) Catch


You should be able to do 10 to 20 repetitions (with PAUSES) without a drop before going on to the next step.

Work on that and you’ll be properly juggling in the next step!

Step 7 – Three Throws = Juggling!

(10:05 at Coach Bob’s video)

 At this step you have officially become a juggler!

We’re finally going to be juggling three balls.

Hold two balls in your right hand, and one ball in your left hand.

The first throw will be done with your right hand which is holding two balls, and it shall be the ball which is further away from your body. (The one held by your fingers, not the one resting in your palm.)

The sound of the pattern will be:

1) Throw

2) Throw

3) Throw

4) Catch


That is:

1) Right (throw the ball that is further away from your body)

2) Left (throw the ball and get ready to catch the ball you’ve thrown at point 1)

3) Right (throw the ball that was in your palm and then catch the ball from point 2)

4) Catch (another ball lands in your left hand, where you’ve already been holding the ball thrown at point 3)


If you do it right, the two balls that you were holding in your right hand before you started, will now be in sitting your left hand.

The throws should be reaching a consistent height – don’t throw the next ball until the first ball hits its peak.

The rhythm and tempo of the juggling is very important. People often tend to throw too fast, throwing multiple balls in the air, but the correct juggling technique requires that only one ball means to be up in the air at a time. Juggling is slower than most people think!


The goal of this step is to manage three throws:

1) Right

2) Left

3) Right

4) Stop

If this is difficult for you, go back some steps, for example when we do the snap (Step 5). You will be replacing that snap with another throw, so it’s useful to first practice the snap.

Don’t worry about juggling in a loop, for now just do three throws and stop.

Once you get good at this pattern (starting with your right hand holding two balls and doing the Right – Left – Right – Stop), then you can start with two balls in your left hand, and do ‘Left – Right – Left – Stop’ pattern.

(I’m referring to the right hand as your dominant hand, but if you’re left-handed, then obviously start with your left hand.)

You have just mastered the basics of juggling. If you can do three throws and catch three throws, you are a juggler.

In the next step, you’ll learn how to increase from three throws to any number, so you can do the proper juggling loop.


Step 8 – Continue the pattern

(12:16 at Coach Bob’s video)

Now, as a new juggler, you should be able to do the “One – Two -Three – Stop” pattern easily. Try it at least ten times in a row (but still with stopping after each three throws).

Make sure you are comfortable with starting (holding the two balls) with either hand.

Once you find this easy, you’re ready to go on to the fourth throw.

The fourth throw is simply another throw instead of the ‘Stop’ (as in the previous step, when you caught the two balls in your hand and rested).

So for example, if in step 7 you did:

1) Right

2) Left

3) Right

4) Stop

You’ll be doing:

1) Right

2) Left

3) Right

4) Left

5) Stop. 

Watch the movement of Coach Bob’s hands (I’ve found this especially helpful) between 12:43 and 13:02 in the video.

Once four throws become easy, you could add one more throw at a time, until you get to about 20 and then you’ll be able to just keep the pattern going.


Things to keep in mind:

– Consistent throws

– Catching low (let the balls come down into your hands)

– Relaxed focus


All this takes a lot of practice, but juggling is completely learnable. As you’re practicing, remember the five P’s:

1) Positive

2) Practice

3) Patience

4) Perseverance and…

5) Pass it on!

Now go and teach somebody else how to a juggle!

A Nice Gift Idea:

You can place the juggling balls in one of these lovely cotton drawstring bags. They are just a perfect size to fit three small juggling balls such as the ones I have been using.


Drawstring cotton gift bag:

Find on Amazon


A set of three juggling balls:

Find on Amazon

BY LUCIE DUN

This site has been (very happily) built with DIVI, by Elegant Themes.

Disclaimer: This page contains affiliate links. This means that if you decide to make a purchase through my links, I will earn a small commission at no extra cost to you. The complete Affiliate Disclosure can be accessed here. If you’d like to learn more about affiliate marketing, check out my favourite platform for online marketers. Thank you for visiting!

   Let’s keep in touch:

Naturegrooves Logo 19

 in alliance with

Buddhagroove-Logo_website
buddhagroove

Pin It on Pinterest