
I perceive myself as a fairly inquisitive person. I like reading and learning new things, but my big problem has always been concentration and long-term focus. Often, reading one book would take me weeks, sometimes months, and I wouldn’t usually remember much afterwards. I wanted to change this.
The Most Brain-Specific Exercise
A few years back I saw a video of a doctor who called juggling ‘the most brain-specific exercise, and who got all his medical students to juggle. According to the students, juggling helped them gain better concentration and relieve stress at the same time.
Affiliate Disclosure: As an Amazon Associate I earn from qualifying purchases. If you make a purchase through my links, I will earn a small commission at no extra cost to you. The full disclosure can be accessed here.
I’ve never been interested in juggling, considering it only as a party trick or a circus-specific sport, but this video stirred my curiosity. If juggling could improve concentration, I thought to myself, it might help me to improve my reading and learning skills in general.
Studies on Effects of Learning a Visual-Motor Skill
An interesting quote from an article called “Changes in Gray Matter Induced by Learning” states:
“Recently, activation-dependant structural brain plasticity in humans has been demonstrated in adults after three months of training a visuomotor skill. Learning three-ball cascade juggling was associated with a transient and highly selective increase in brain gray matter in the occipito-temporal cortex comprising the motion sensitive area hMT/V5 bilaterally.“
An Oxford study claims that learning a new skill such as juggling creates more white matter in the brain. White matter are the nerve strands that help different parts of the brain communicate with each other, and an activity such as juggling can boost the connection between different parts of the brain.
Thanks to all these studies, programmes are now being put in place for people with brain injuries (such as stroke victims) to be taught to juggle in an attempt to increase their brain functioning.

Benefits of Learning to Juggle
Juggling encourages the brain to work in a crossover pattern, which can be beneficial for children and adults with dyslexia, as well as anyone who would like to improve their reading skills.
Complex learning tasks, juggling included, provide multiple benefits, such as:
– Relieving stress
– Sharpening focus and concentration
– Increasing dexterity and coordination
– Diminishing food cravings
– Assisting in the cessation of smoking
– Prevention or delay of Alzheimer’s disease
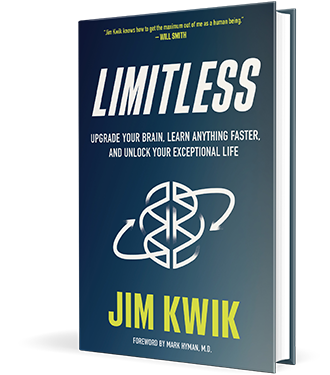
Jim Kwik
One of the people talking highly of juggling is a renowned ‘brain coach’ Jim Kwik, a world expert in speed-reading, memory improvement, brain performance, and accelerated learning. For over 25 years, Jim has worked with students, seniors, educators, athletes, as well as many of the world’s leading CEOs and celebrities such as Will Smith.

Jim considers juggling one of the most important exercises for the brain. He says that movement such as juggling helps our brain build new connections and thus it’s one of the best tools for improving our learning skills. In his own words, ‘As your body moves, your brain grooves’.
I’m a great fan of Jim Kwik. He is one of a few whose fame hasn’t gone to their heads. I love his warmth and humility. It was he who really inspired me to learn to juggle, which has considerably improved my reading skills, focus and memory. I’m immensely grateful to him.
I find his personal story very moving – as a child he suffered from a serious brain injury, after which he found it extremely challenging to learn anything, especially reading. One of his teachers even called him ‘the boy with a broken brain’.
However, Jim perceived it as a life challenge in the best possible sense and created strategies to dramatically enhance his mental performance, which got him to where he is today – helping others to maximize their performance, unleash their potential and find true meaning in life. He is also the author of the 2019 bestseller ‘Limitless’.
Jim says that we’re not practicing juggling just for the sake of it. He views learning to juggle as a metaphor for embracing challenges in our life. When you’re learning to juggle you are forced to develop certain discipline, which will benefit all areas of your life.
As Jim says: “If you’re able to create one new habit, what else will you be able to do? Possibilities will open up because you’ll be in the habit of creating empowering habits.”
The Treasure You Seek…
Here are a few great quotes that Jim often uses. I particularly like the last one which is rather subtle, but so true! That thought-provoking sentence was a revelation to me – I recognized myself in it at once, and the realisation has completely revolutionized my workflow.
– If an egg is broken by an outside force, life ends. If broken by an inside force, life begins. Great things always begin from the inside.
– First you create your habits and then your habits create you.
– Whether you think you can, or you think you can’t – you’re right. (Henry Ford)
– How you do anything is how you do everything.
– The difference between a normal person and a champion is that a champion is willing to push past the pain period.
– The treasure you seek is found in the task you’re avoiding!
My Own Juggling Adventure
After having read all the good things about juggling and its effects on one’s brain, I decided to learn to juggle.
I’ve documented a part of my learning journey here. Get ready for my juggling feats but do not necessarily follow everything I do there…!
The tutorial I’m mentioning in my video is, to my mind, one of the clearest, most beginner-friendly juggling tutorial I’ve ever come across. The guy who teaches it, ‘Coach Bob’, is a real juggling pro (do check his and his wife’s website full of their crazy juggling acrobatics).
His instructions are super-comprehensive, step-by-step, not like the usual three-step instructions that come with the box of juggling balls, or some other Youtube tutorials which don’t always seem to empathise with a real beginner’s mind.
Coach Bob breaks his tutorial into eight steps, and each step must be learned properly before moving on to the next one.
I’m happy to say that thanks to Coach Bob’s video I finally learned the three-ball cascade. As you can see in my video above, I’ve reached my goal of juggling for one minute.
Below is Coach Bob’s training step-by-step. If you follow this tutorial and practice a little bit every day, then you should be able to juggle in less than two weeks’ time, if not earlier!
Go Slower, Arrive Sooner
‘If you can tie your own shoes you can learn how to juggle’.
This is how Coach Bob introduces his tutorial.
He is adamant that YOU can learn to juggle as well, because he taught a wide range of people to juggle: Between the ages of six and eighty!
The coach Bob method is an 8-step process.
I’d recommend to watch the video and follow the points written here step-by-step. You don’t have to read all the notes – rather use them as a reference.
It is really important to remember this:
If you go slower, you’ll arrive sooner. Take the time to master each step before going to the next one.
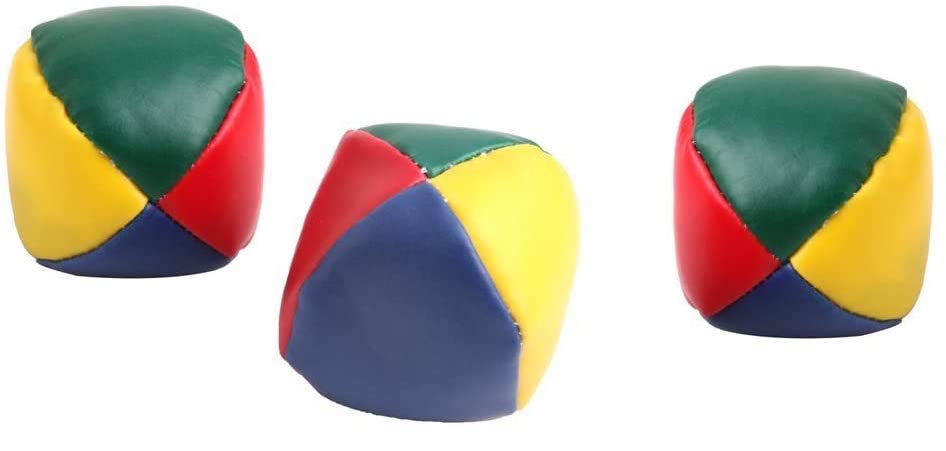
Juggling Balls
Before you start learning, make sure you have suitable juggling balls that don’t bounce all around, because it would drive you crazy. Don’t use tennis balls or anything that bounces. The best type is a so-called ‘beanbag’, and you can get a set of three for almost nothing on Amazon. (And if you cannot wait before they arrive, you can always resort to rolled-up socks! 🙂
Learn to Juggle Three Balls – a Tutorial for Beginners by Coach Bob
Step 1 – Basic Throw with One Ball
(1:10 at Coach Bob’s video)
The first step in learning to juggle three balls is a one ball drill. This gets you used to the basic throw you’ll use in three ball juggling.
Bend your arms in the juggling position.
You need to imagine a rectangular box in front of you.
The box has its lower corners in line with your bent elbows, and the upper corners are a bit above your head.
Start with your hands pointed slightly inwards (which will form the lower two corners of the box) and then throw the ball towards to opposite top corner of the imaginary box. This should be slightly higher than you head is.
The technique of the throw is also important: Don’t throw it fast in a jerky way – the throw should be more of a scooping motion.
When the ball reaches the opposite top corner, then you just let the ball fall straight down to that bottom corner, and catch.
Then repeat the process with your opposite hand (which is usually the weaker hand, so this is going to need some extra practice), and again, throw the ball up towards the opposite corner, let it fall, and catch it.
The sound of this basic pattern is:
1) Throw
2) Catch
Do this until it becomes comfortable. Keep your chin up to help you get the necessary height – the ball should peak above your head.
Also, make sure the throws are consistent, i.e. that the ball always reaches the same height in those imaginary top corners.
Now go ahead and practice the Step 1 until it becomes really comfortable and you are reaching the same height.
Step 2 – Adding a snap of the fingers (Throw – Snap – Catch)
(2:41 at Coach Bob’s video)
We’re going to continue with one ball, and we’re going to add a snap of the fingers before you catch the ball.
You’re going to throw with your right hand (or whatever hand you start with), and when that ball hits the peak, that’s when you snap your fingers before catching it.
The sound of the technique is:
1) Throw
2) Snap + Catch
Do the snap just as the ball peeks, (or maybe a little bit after).
If for some reason you can’t snap your fingers, you can replace the snap with a slap of your thigh.
If you’re throwing too low, you may not have time to get that snap (or slap). The higher the throw is, the more time you have to snap (or throw another ball as we’ll see in Step Three).
Step 3 – Throw – Throw – Drop – Drop
(3:50 at Coach Bob’s video)
For step three Bob recommends to find a table, or a bed, or anything that will keep you from having to constantly bend over and pick up the juggling balls when you drop them – because now we’re going to start dropping quite a bit!
In step three we’ll be using two balls. Start with the more confident hand, and throw one of the balls up to the opposite corner of the imaginary box.
When that ball hits the corner, instead of snapping (which we did in Step 2) you’re going to throw the other ball to the opposite corner.
And because you hopefully have something like a table or a bed in from of you, you shouldn’t worry about catching the balls. Instead, you should keep your full focus on the throws.
When the ball peaks, throw in the second ball.
The sound of this pattern is:
1) Throw
2) Throw
3) Drop
4) Drop
You should hear FOUR distinct beats:
“One – two – three four, one – two – three – four”.
Also, notice where the balls are landing, because that will tell you whether you are on the right path.
If you have a table in from of you, notice where on the table the balls are landing – they should land right in front of you.
Or, if you weren’t using a table, they should by your feet, but not much further.
Spend a lot of time practicing this until you become really confident with this technique. It will make learning the next steps much easier.
Also, teach both your hands, right and left, to become confident with that first throw.
For example, if you do:
1) Right
2) Left
3) Drop
4) Drop
Then also practice:
1) Left
2) Right
3) Drop
4) Drop
Don’t go on to the next step until the technique in Step feels very comfortable. It’s worth waiting for a few days, focusing just on this technique. Your patience will pay off – you’ll see for yourself soon.
Step 4 – Throw – Throw – Catch – Catch
(5:27 at Coach Bob’s video)
Step four is this most difficult step in the eight step process, and this is where most people quit learning to juggle – but not you! YOU CAN DO IT. Now I have to admit something here: I tried to learn to juggle a year ago, but, shamefully, after about a week of trying and not getting it right at all, I quit. It was too frustrating and I didn’t like to see myself like a loser, so it was easier to just forget it.
The one excuse I have is that I didn’t find a tutorial video which would suit my pace and my way of learning. I’m pretty sure that if I found Coach Bob’s video back then, that I wouldn’t quit.
So hopefully this tutorial (together with his demonstration in the video), will save you plenty of time of searching for a comprehensive, thorough tutorial, and also save you from that frustrating feeling of being stuck on your learning way and doubting yourself.
Now, let’s get on with Step 4:
We’re going to start with two balls again, like in the previous step. But instead doing:
1) Throw
2) Throw
3) Drop
4) Drop,
we’re going to do:
1) Throw
2) Throw
3) Catch
4) Catch
While doing this, keep those catching hands quite low down – don’t be tempted to catch them too high up in th3e air. We need the throws to be quite slow, and we achieve this by creating some distance between the ball and the catching hand.
Also, watch for consistent height on the throws.
This is going to be difficult at first, but stick with it. This is a crucial step to learn before going on to the next step. As Coach Bob says, using a witty quote, ‘Everything is difficult until it becomes easy.’
Once again, there should be four distinct
beats: “One – two – three four, one – two – three – four…”
when you are doing the “Throw – Throw – Catch – Catch”.
Remember to change the starting hand, so both your left and right hand are confident at doing the starting throw. Basically, both your hands should be equally trained to do the starting throw, in order to hit the same height of the opposite corners in that imaginary box.
So, practice this pattern:
1) Right
2) Left
3) Catch
4) Catch
And then:
1) Left
2) Right
3) Catch
4) Catch
At this point you shouldn’t do a continuous juggle, (a loop) although it may be tempting; a lot of people will try to keep two balls in the air in a frantic loop, but at this point, we are just practicing in order to give our future juggling precision and good rhythm, so these throws should not yet be continuous.
Instead, it should be just one part:
1) Throw
2) Throw
3) Catch
4) Catch
Then stop, take a deep breath, and only after a pause do another repetition of this pattern. (And remember to give both hands a chance at the starting throw)
Also, don’t worry about speed, just get that four distinct beats down and you should start improving. If you find it too difficult, go back to Step Three, and work on the “Throw – Throw – Drop – Drop” pattern.
Don’t forget to keep a consistent height of those throws.
What might help you is to keep your chin slightly lifted, so you can throw the balls a bit higher and still be in control.
All this we’ve been doing in this step is going to take a lot of practice – don’t rush through this step. It will really pay off if you are patient and stick with the practice. Coach Bob closes this part of the tutorial with another highly relevant quote – ‘Go slower, arrive sooner’!
Step 5 – Throw – Throw – Snap – Catch
(7:08 at Coach Bob’s video)
For step 5 we’re going to stick with using two balls and doing the “Throw – Throw – Catch – Catch” pattern, but we’re also going to add a snap of the fingers.
The snap will be done by the hand that has thrown the first ball. And it will be done in the moment when the second ball is falling from the top corner, just about to land in that snapping hand.
The sound of the pattern will be:
1) Throw
2) Throw
3) Catch
4) Snap + Catch
The hand that throws the first ball will be the one doing that snap just before catching the second ball, so it will sound like this:
1) Right
2) Left
3) Catch
4) Snap (with right hand) + Catch (with right hand)
Or, if we start with the left hand, the pattern will sound:
1) Left
2) Right
3) Catch
4) Snap (with left hand) + Catch (with left hand)
To describe the steps with even more detail, so you can fully visualise these patterns in slow motion and then try it for real. It’s really useful to rehearse these movements in your imagination, because the brain registers it anyway, and, rewarding you for the mental work, it will make the real life situation easier for you later on.
Let’s imagine we are starting with our right hand:
1) Right hand throws the first ball
2) Left hand throws the second ball
3) Left hand catches the first ball
4) Right hand snaps, and then catches the second ball.
And vice versa, if you want:
1) Left hand throws the first ball
2 Right hand throws the second ball
3) Right hand catches the first ball
4) Left hand snaps, and then catches the second ball.
If you can’t snap, you can slap the side of your thigh instead, or whatever feels comfortable, and which you can do with ease just before catching that ball.
You may be wondering why bother with that snap at all?
It’s because eventually that snap is going to be another throw when you are using three balls.
So before we attempt the three-ball juggling, you should get used to doing something with that space between the two catches (because soon there’s going to be a throw between them, instead of the snap).
All the exercises we have done so far are very important.
Here is a recap of the patterns we’ve learnt so far to practice:
1) With one ball:
1) Throw
2) Catch
2) With one ball:
1) Throw
2) Snap + Catch
3) With two balls:
1) Throw
2) Throw
3) Catch
4) Catch
4) With two balls:
1) Throw
2) Throw
3) Drop
4) Drop
5) With two balls:
1) Throw
2) Throw
3) Catch
4) Snap + Catch
You should be able to do about 10 to 20 of these in a row without dropping, starting with either hand, before you go on to the next step.
Aim for consistent heights and consistent throws, and try to stay relaxed when you’re doing this. Relaxed focus is the best state for successful juggling!
Step 6 – Throw – Throw – Catch – Catch (with three balls)
(8:30 at Coach Bob’s video)
Now we finally get to start working with 3 balls!
We’ll start with having two balls in one hand, and one in the other hand. The first throw will be done with the hand that has two balls in it.
It can be either right or left hand, whichever feels more natural for you. But for this example, let’s say you’ve opted for the right hand as the starting one.
Put two balls in your right hand; one ball will sit in your palm (and will stay there without moving during the whole Step 6 practice.)
Then you make a ‘peace sign’ with your index and third finger, and extend your thumb as well, and grab another ball with these three fingers.
You always start juggling with the hand that has more balls in it.
For this practice, we will start with the right hand. (Although you can start with any hand.)
Now, keeping the first ball in the palm of your right hand without throwing it, we’ll do the pattern from Step 4:
1) Throw
2) Throw
3) Catch
4) Catch
Once again, remember that at this stage you should be juggling with two balls only, keeping the third ball passively sitting in your palm.
You only have three fingers available (thumb, index and middle finger) to throw the other ball, while the first one is resting in the palm of the same hand.
You’ll need to get used to throwing the ball using those three fingers only, and at the same time keep the other ball in the palm of your hand. It may feel a bit clumsy at first.
And as you do the “Throw – Throw – Catch – Catch” pattern, you’ll be using those three fingers for throws as well as catches, while always holding that third ball in your palm without throwing it.
This way you will gain enough practice in order to move on to the next steps.
Let’s go through the process again, starting with the right hand:
1) Throw
2) Throw
3) Catch
4) Catch
That is:
1) Right
2) Left
3) Catch
4) Catch
Or, described with even more detail:
1) Right hand holds two balls, and throws the one further from the body, using three fingers only.
2) Left hand throws
3) Left hand catches the ball thrown by the ‘three fingers only’ from the right hand
4) Right hand, which has been clutching the third stationary ball, catches the ball thrown by the left hand.
Try to visualise this in slow motion, you’ll be training your brain, creating new neural connections, (brain loves novelty and learning!) and it will later reward you for this by making the whole learning process easier.
Repeat the “Right – Left – Catch – Catch” process several times.
But don’t try to attempt any loops yet, always pause after each set:
“Right – Left – Catch – Catch – STOP,
Right – Left – Catch – Catch – STOP” Etc.
Once this pattern becomes easy, you’re going to put the set of the two balls in your left hand, and start working on the opposite side:
1) Left
2) Right
3) Catch
4) Catch
You should be able to do 10 to 20 repetitions (with PAUSES) without a drop before going on to the next step.
Work on that and you’ll be properly juggling in the next step!
Step 7 – Three Throws = Juggling!
(10:05 at Coach Bob’s video)
At this step you have officially become a juggler!
We’re finally going to be juggling three balls.
Hold two balls in your right hand, and one ball in your left hand.
The first throw will be done with your right hand which is holding two balls, and it shall be the ball which is further away from your body. (The one held by your fingers, not the one resting in your palm.)
The sound of the pattern will be:
1) Throw
2) Throw
3) Throw
4) Catch
That is:
1) Right (throw the ball that is further away from your body)
2) Left (throw the ball and get ready to catch the ball you’ve thrown at point 1)
3) Right (throw the ball that was in your palm and then catch the ball from point 2)
4) Catch (another ball lands in your left hand, where you’ve already been holding the ball thrown at point 3)
If you do it right, the two balls that you were holding in your right hand before you started, will now be in sitting your left hand.
The throws should be reaching a consistent height – don’t throw the next ball until the first ball hits its peak.
The rhythm and tempo of the juggling is very important. People often tend to throw too fast, throwing multiple balls in the air, but the correct juggling technique requires that only one ball means to be up in the air at a time. Juggling is slower than most people think!
The goal of this step is to manage three throws:
1) Right
2) Left
3) Right
4) Stop
If this is difficult for you, go back some steps, for example when we do the snap (Step 5). You will be replacing that snap with another throw, so it’s useful to first practice the snap.
Don’t worry about juggling in a loop, for now just do three throws and stop.
Once you get good at this pattern (starting with your right hand holding two balls and doing the Right – Left – Right – Stop), then you can start with two balls in your left hand, and do ‘Left – Right – Left – Stop’ pattern.
(I’m referring to the right hand as your dominant hand, but if you’re left-handed, then obviously start with your left hand.)
You have just mastered the basics of juggling. If you can do three throws and catch three throws, you are a juggler.
In the next step, you’ll learn how to increase from three throws to any number, so you can do the proper juggling loop.
Step 8 – Continue the pattern
(12:16 at Coach Bob’s video)
Now, as a new juggler, you should be able to do the “One – Two -Three – Stop” pattern easily. Try it at least ten times in a row (but still with stopping after each three throws).
Make sure you are comfortable with starting (holding the two balls) with either hand.
Once you find this easy, you’re ready to go on to the fourth throw.
The fourth throw is simply another throw instead of the ‘Stop’ (as in the previous step, when you caught the two balls in your hand and rested).
So for example, if in step 7 you did:
1) Right
2) Left
3) Right
4) Stop
You’ll be doing:
1) Right
2) Left
3) Right
4) Left
5) Stop.
Watch the movement of Coach Bob’s hands (I’ve found this especially helpful) between 12:43 and 13:02 in the video.
Once four throws become easy, you could add one more throw at a time, until you get to about 20 and then you’ll be able to just keep the pattern going.
Things to keep in mind:
– Consistent throws
– Catching low (let the balls come down into your hands)
– Relaxed focus
All this takes a lot of practice, but juggling is completely learnable. As you’re practicing, remember the five P’s:
1) Positive
2) Practice
3) Patience
4) Perseverance and…
5) Pass it on!
Now go and teach somebody else how to a juggle!

A Nice Gift Idea:
You can place the juggling balls in one of these lovely cotton drawstring bags. They are just a perfect size to fit three small juggling balls such as the ones I have been using.

A set of three juggling balls:

BY LUCIE DUN
This site has been (very happily) built with DIVI, by Elegant Themes.

Disclaimer: This page contains affiliate links. This means that if you decide to make a purchase through my links, I will earn a small commission at no extra cost to you. The complete Affiliate Disclosure can be accessed here. If you’d like to learn more about affiliate marketing, check out my favourite platform for online marketers. Thank you for visiting!
Let’s keep in touch:

in alliance with

Hi, Lucie,
When I first read the title of your post, I thought it would be about those times we try to juggle too many things in our hands. I was thinking metaphorically lol.
Anyway, I’m a person that tends to stress easily. I practiced juggling maybe once or twice in my life but just for the sake of it, never for any therapeutic effects. Now that I know that it can be good for my brain, I’ll try to practice it more. I just hope I don’t get stressed even more. 😀
Thanks for sharing.
Thanks for your lovely reply, Enrique, which also made me laugh! 🙂 ‘I just hope I don’t get stressed even more’…he he! Well, to tell you the truth, you should have seen me when I started..! I was all over the place, chasing the balls, cussing, on the verge of giving up completely. But fortunately, I’ve read a lot of Eckhart Tolle’s ‘The Power of Now’, and I’m trying to consciously practice it, so it has helped me to stay in the present moment and not to take my own mental commentary too seriously. I also do a lot of meditation, which is the Number One de-stressor! Check my article on meditation, you may want to try it and see how it can lower your stress levels and make you less reactive in general. Good luck!
Hello there thanks for this helpful review. It is of great value. On my opinion on this topic I think one of the best way to get your mind focused to t practice multitasking, not disputing the fact that juggling also does help. But then learning how to multitask helps you to gain control of your brain.
Hi Philebur, thank you for your opinion! I agree, there can be many other things that strengthen your focus and concentration – such as martial arts, meditation, yoga, various complex cognitive tasks, etc, but juggling is so practical, you can do it even for a very short time while waiting for your kettle to boil, etc! 🙂 And I find it is easier to commit to on a frequent basis than any of the other things. Also, on an energetic level, it also supports the crossover pattern, which is really good for your brain, and it has been said to have helped people with dyslexia.
I must commend your effort in putting up this splendid article on how to juggle, after thoroughly going through it, I must say your tips to learn how to juggle are tremendous as even a bady could do it applying all your tips….i.must say you are good at what you do and I hope yo keep up the good work…
Thanks a lot, Evans! I got so inspired to write this article because not long ago I thought that I could never learn how to juggle. But following those steps every day (even just a little) resulted in the ‘little miracle’- suddenly I was juggling! I fully agree with the ‘Superbrain’ coach Jim Kwik, who says that learning to juggle – developing the working discipline and sticking to it – can help you achieve much bigger things because you will get used to being uncomfortable (which always happens when we’re learning something difficult) and we’ll develop stronger willpower which will lead to success.